Deploy OpenClaw AI Assistant on Tencent Cloud in 30 Minutes
Step-by-step guide to deploy OpenClaw (formerly Moltbot/Clawdbot) AI assistant on Tencent Cloud Lighthouse instance. Includes Moonshot AI configuration and Discord Bot integration.
Deploy OpenClaw AI Assistant on Tencent Cloud in 30 Minutes
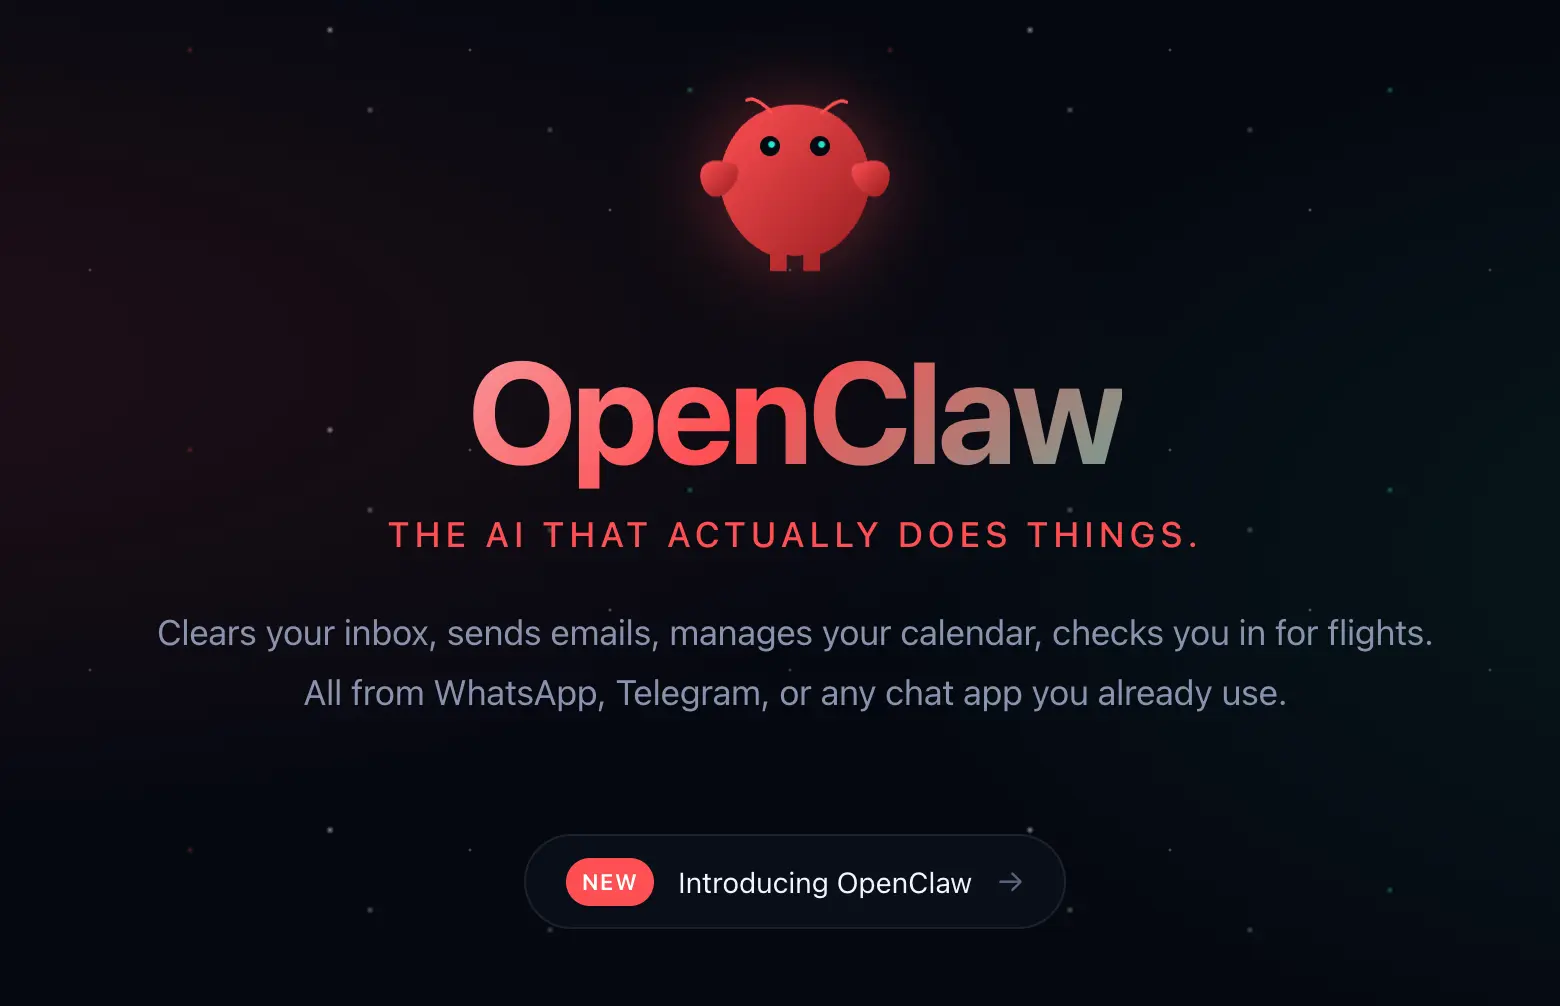
Naming Note: This project was originally named Clawdbot, then renamed to Moltbot, and is now officially called OpenClaw. “OpenClaw” in this document refers to the latest version.
Last Updated: 2026-01-30 15:41:02
Why Choose OpenClaw?
OpenClaw is an open-source personal AI assistant designed for self-hosting on personal devices or cloud servers. It acts as a proactive “digital assistant” with the following core advantages:
- 🧠 Long-term Memory: Locally stores conversation data, remembering your preferences and history
- ⚡ Task Execution: Not just for chatting - it actually gets work done (file organization, form submission, code writing)
- 📱 Multi-platform Integration: Supports cross-platform push notifications via Discord, WhatsApp, etc.
- 🔒 Privacy Control: Data completely under your control
- 💰 Low Cost: One lightweight cloud server is enough for 24/7 operation
This document will walk you through deploying OpenClaw on Tencent Cloud Lighthouse in 30 minutes, even for beginners!
Note:
This tutorial’s Moltbot application image is based on Ubuntu Server 24.04 LTS 64-bit operating system. Application images are updated regularly. Please refer to the actual image information on the purchase page.
Quick Deployment on Tencent Cloud Lighthouse
Step 1: Purchase and Create Server (5 minutes)
On the Lighthouse purchase page, select the required configuration to complete the purchase.
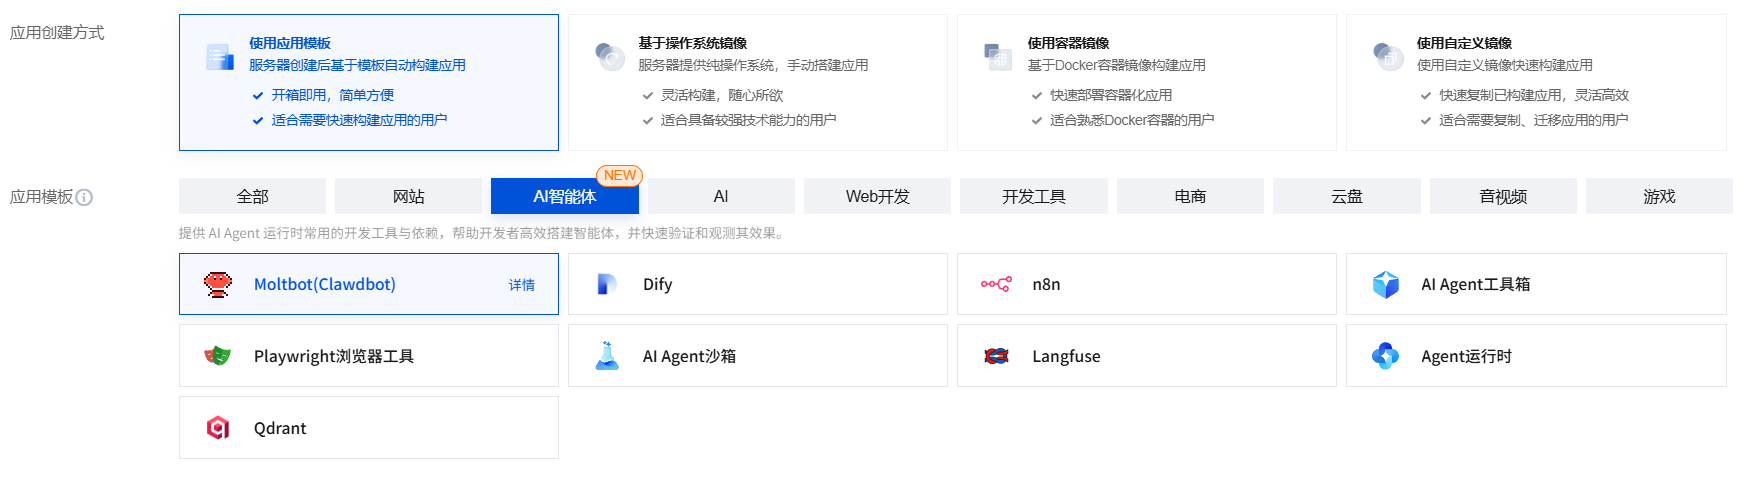
Application Creation Method: Select Use Application Template > AI Agents > Moltbot(Clawbot)
Note: Although the image name still shows Moltbot, the latest version of OpenClaw is deployed. For other parameters, refer to Tencent Cloud purchase documentation for configuration.
Note:
Application template refers to application image.
For image details, see Basic Concepts.
Region: It’s recommended to select a region close to your target users to reduce network latency and improve access speed. For example, if your target users are in Shenzhen, select Guangzhou.
Availability Zone: Default to Random Assignment, or manually select an availability zone.
Note:
“Random Assignment” is recommended. Instances in different availability zones within the same region can communicate via internal network. Different availability zones within the same region enable fault isolation. If your application requires extremely high disaster recovery capability, you can deploy different instances in different availability zones within the same region. However, note that cross-zone communication latency will be slightly higher than within the same zone.
Once an instance is created, the availability zone cannot be changed.
Instance Package: Product bundle sales method (including package type, specifications). Different packages include different combinations of CPU, memory, SSD cloud disk, bandwidth or peak bandwidth, and traffic package. See Basic Package for details.
Server Name: Custom instance name. If left blank, the selected image name is used by default. When creating instances in batches, consecutive naming suffix numbers automatically increment. For example, if you enter “LH” and select quantity 3, the 3 created instances will be named LH1, LH2, LH3.
Login Method: You can set the instance’s login method through this option.
Password Login:
Auto-generate Password: The auto-generated password will be sent via internal message.
Custom Password: Custom set the instance’s login password.
SSH Key: Bind SSH keys for Linux instances.
Scan Code Login: After setting, supports passwordless login to Linux instances via WeChat scan.
Auto Renewal: Configure as needed.
Shared Storage: You can choose to purchase a shared storage value resource package during instance creation, which will automatically mount the default object storage bucket. See Introduction for details. Notes:
For instances purchased after October 17, 2023, you can choose whether to purchase shared storage. Previously purchased instances can purchase packages on the Object Storage Console.
If the region already has an active shared storage package, subsequent instance purchases can directly select one-click mount bucket, and the shared storage package will not be offered again.
Currently, only Linux images in application templates and operating system images support shared storage.
Duration: Represents the usage duration of the Lighthouse instance.
Note:
You can check When account balance is sufficient, auto-renew instance monthly after expiration to enable auto-renewal. After successful instance creation, see Auto Renewal to modify existing auto-renewal settings.
Quantity: Represents the number of Lighthouse instances to purchase.
- Click Buy Now and submit payment according to page prompts.
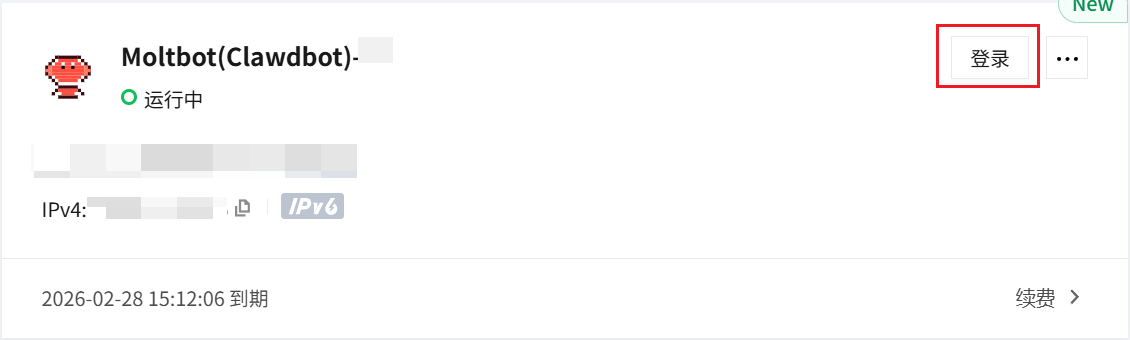
Step 2: Run OpenClaw Configuration Wizard (10 minutes)
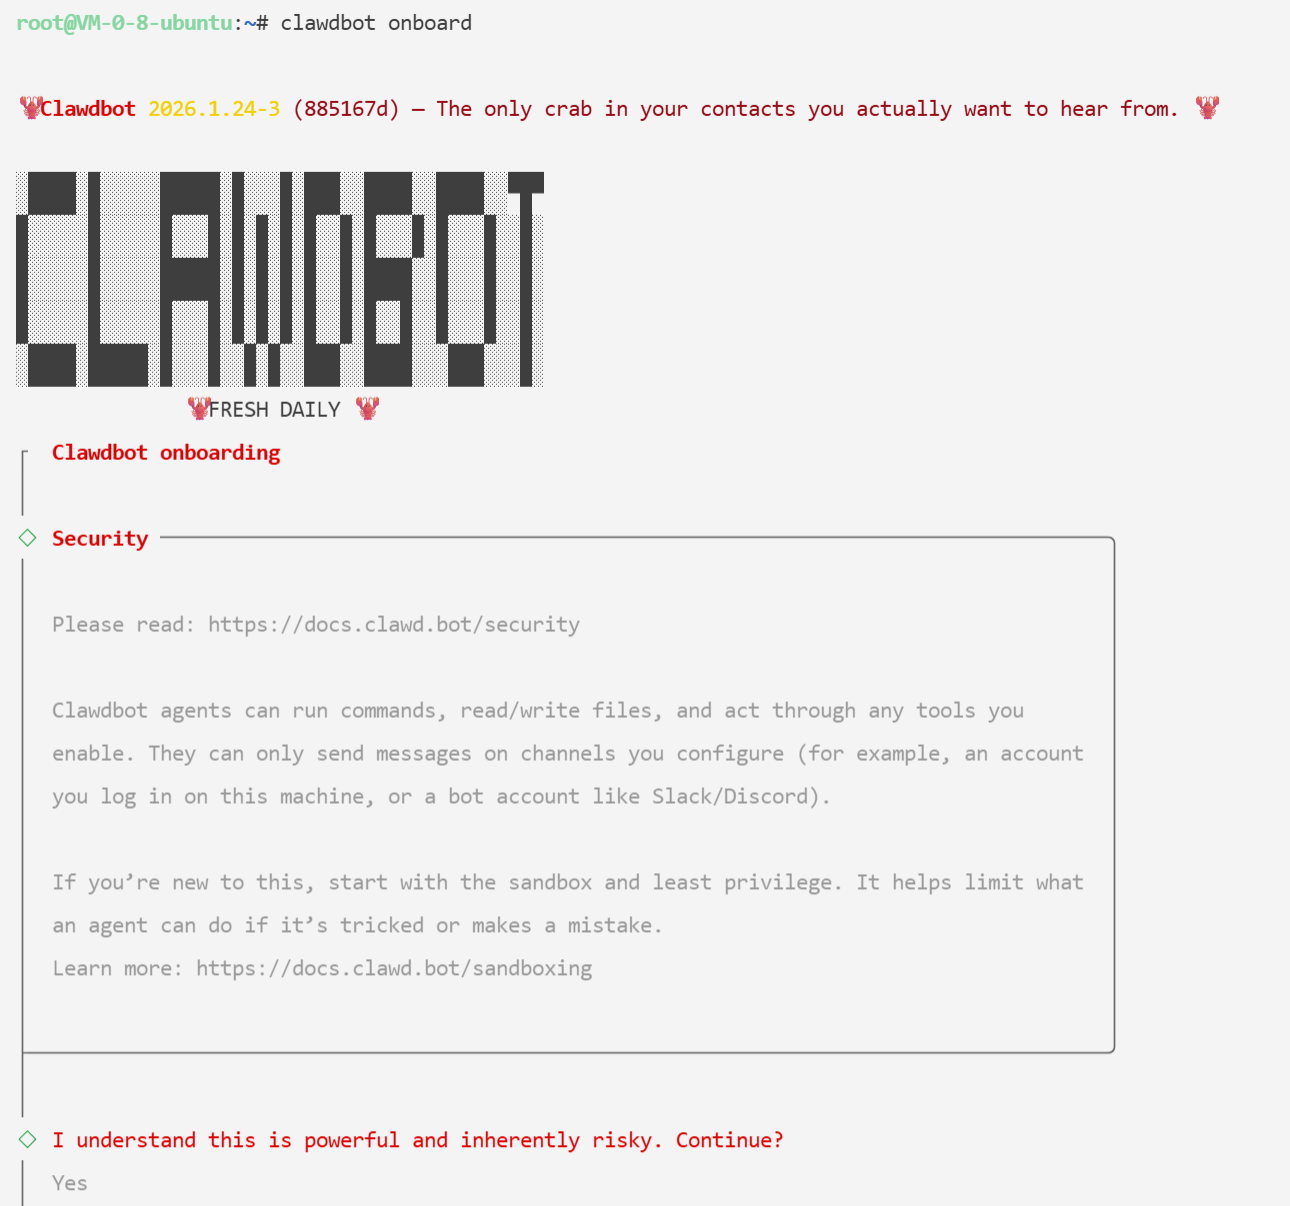
Unlike other common application templates, OpenClaw requires several manual configuration steps provided by the official community. After first logging into the server, run the following command to start configuration:
clawdbot onboard
Operation Instructions:
After running the above command, you need to complete subsequent configuration actions via keyboard:
- Arrow Keys: Control options
- Enter Key: Select and confirm
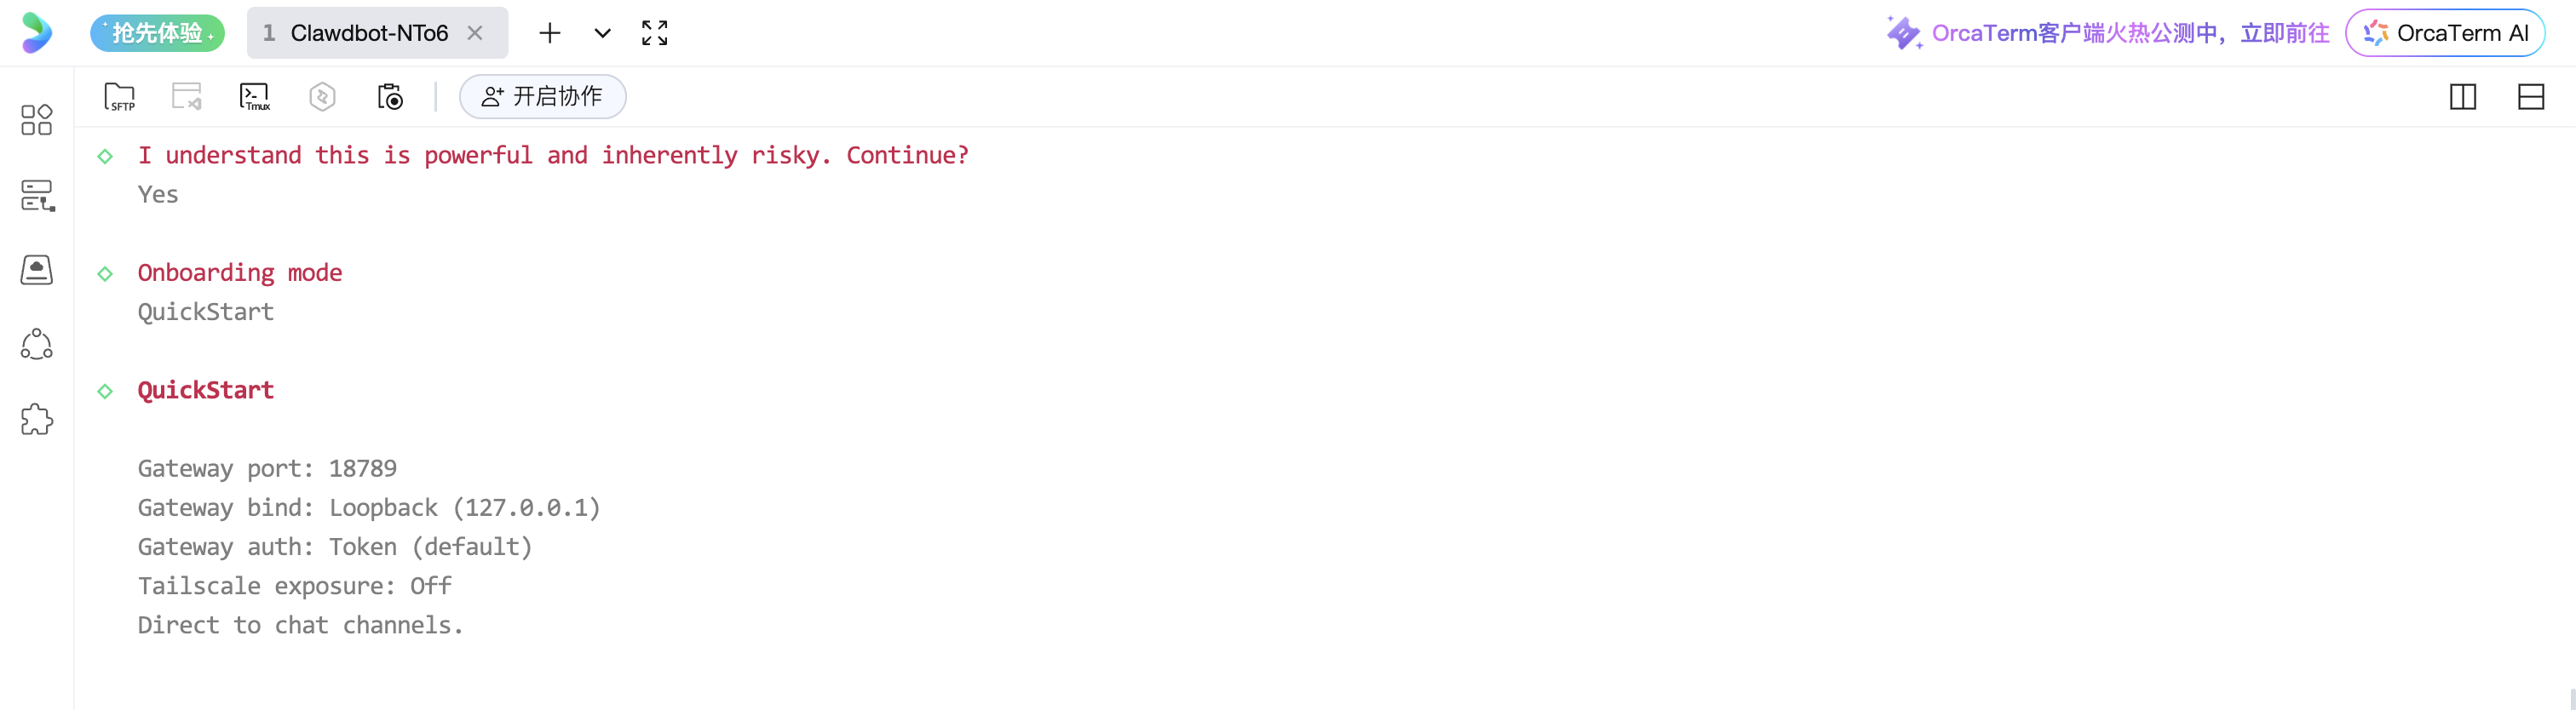
After running the above command, the system will prompt: “I understand this is powerful and inherently risky. Continue?”
Please fully understand the related risks before entering Yes. For related risk description, see OpenClaw Official Documentation
Step 3: Configure AI Model and Communication Channel
Complete the following configuration according to page prompts:
3.1 Select Configuration Mode
Onboarding mode select Quick Start (quickstart)
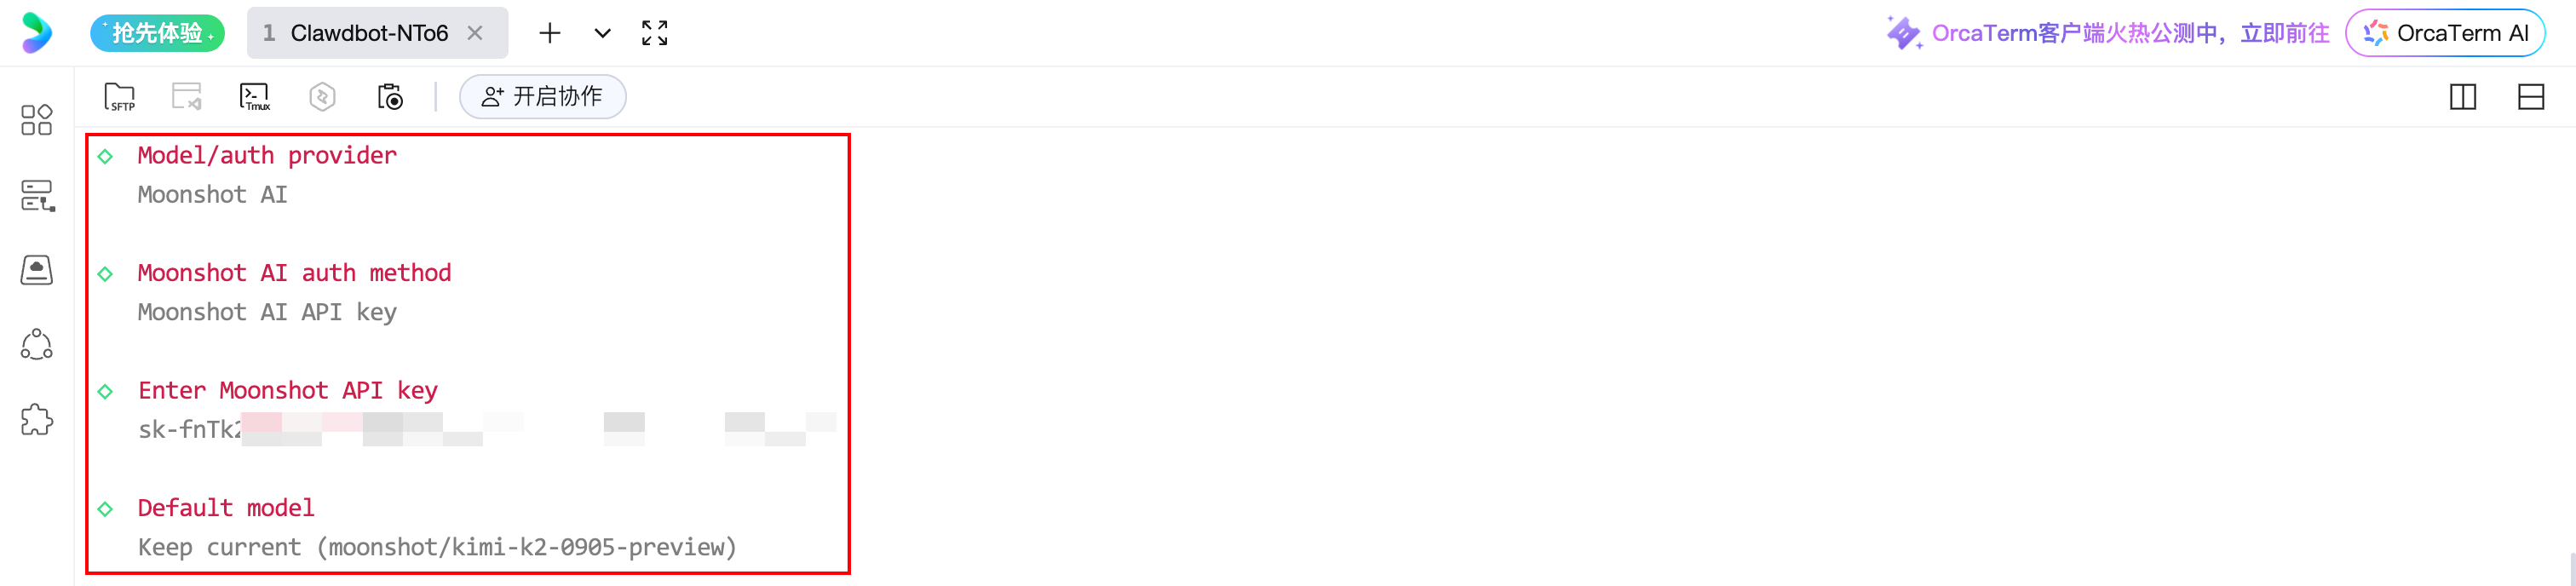
3.2 Configure Moonshot AI
Complete the following configuration according to Model/auth provider:
- Moonshot AI auth method: Select
Moonshot AI API key - API Key: Enter your Moonshot API Key (Get address)
- Default model: Select
Keep current
3.3 Configure Discord Bot
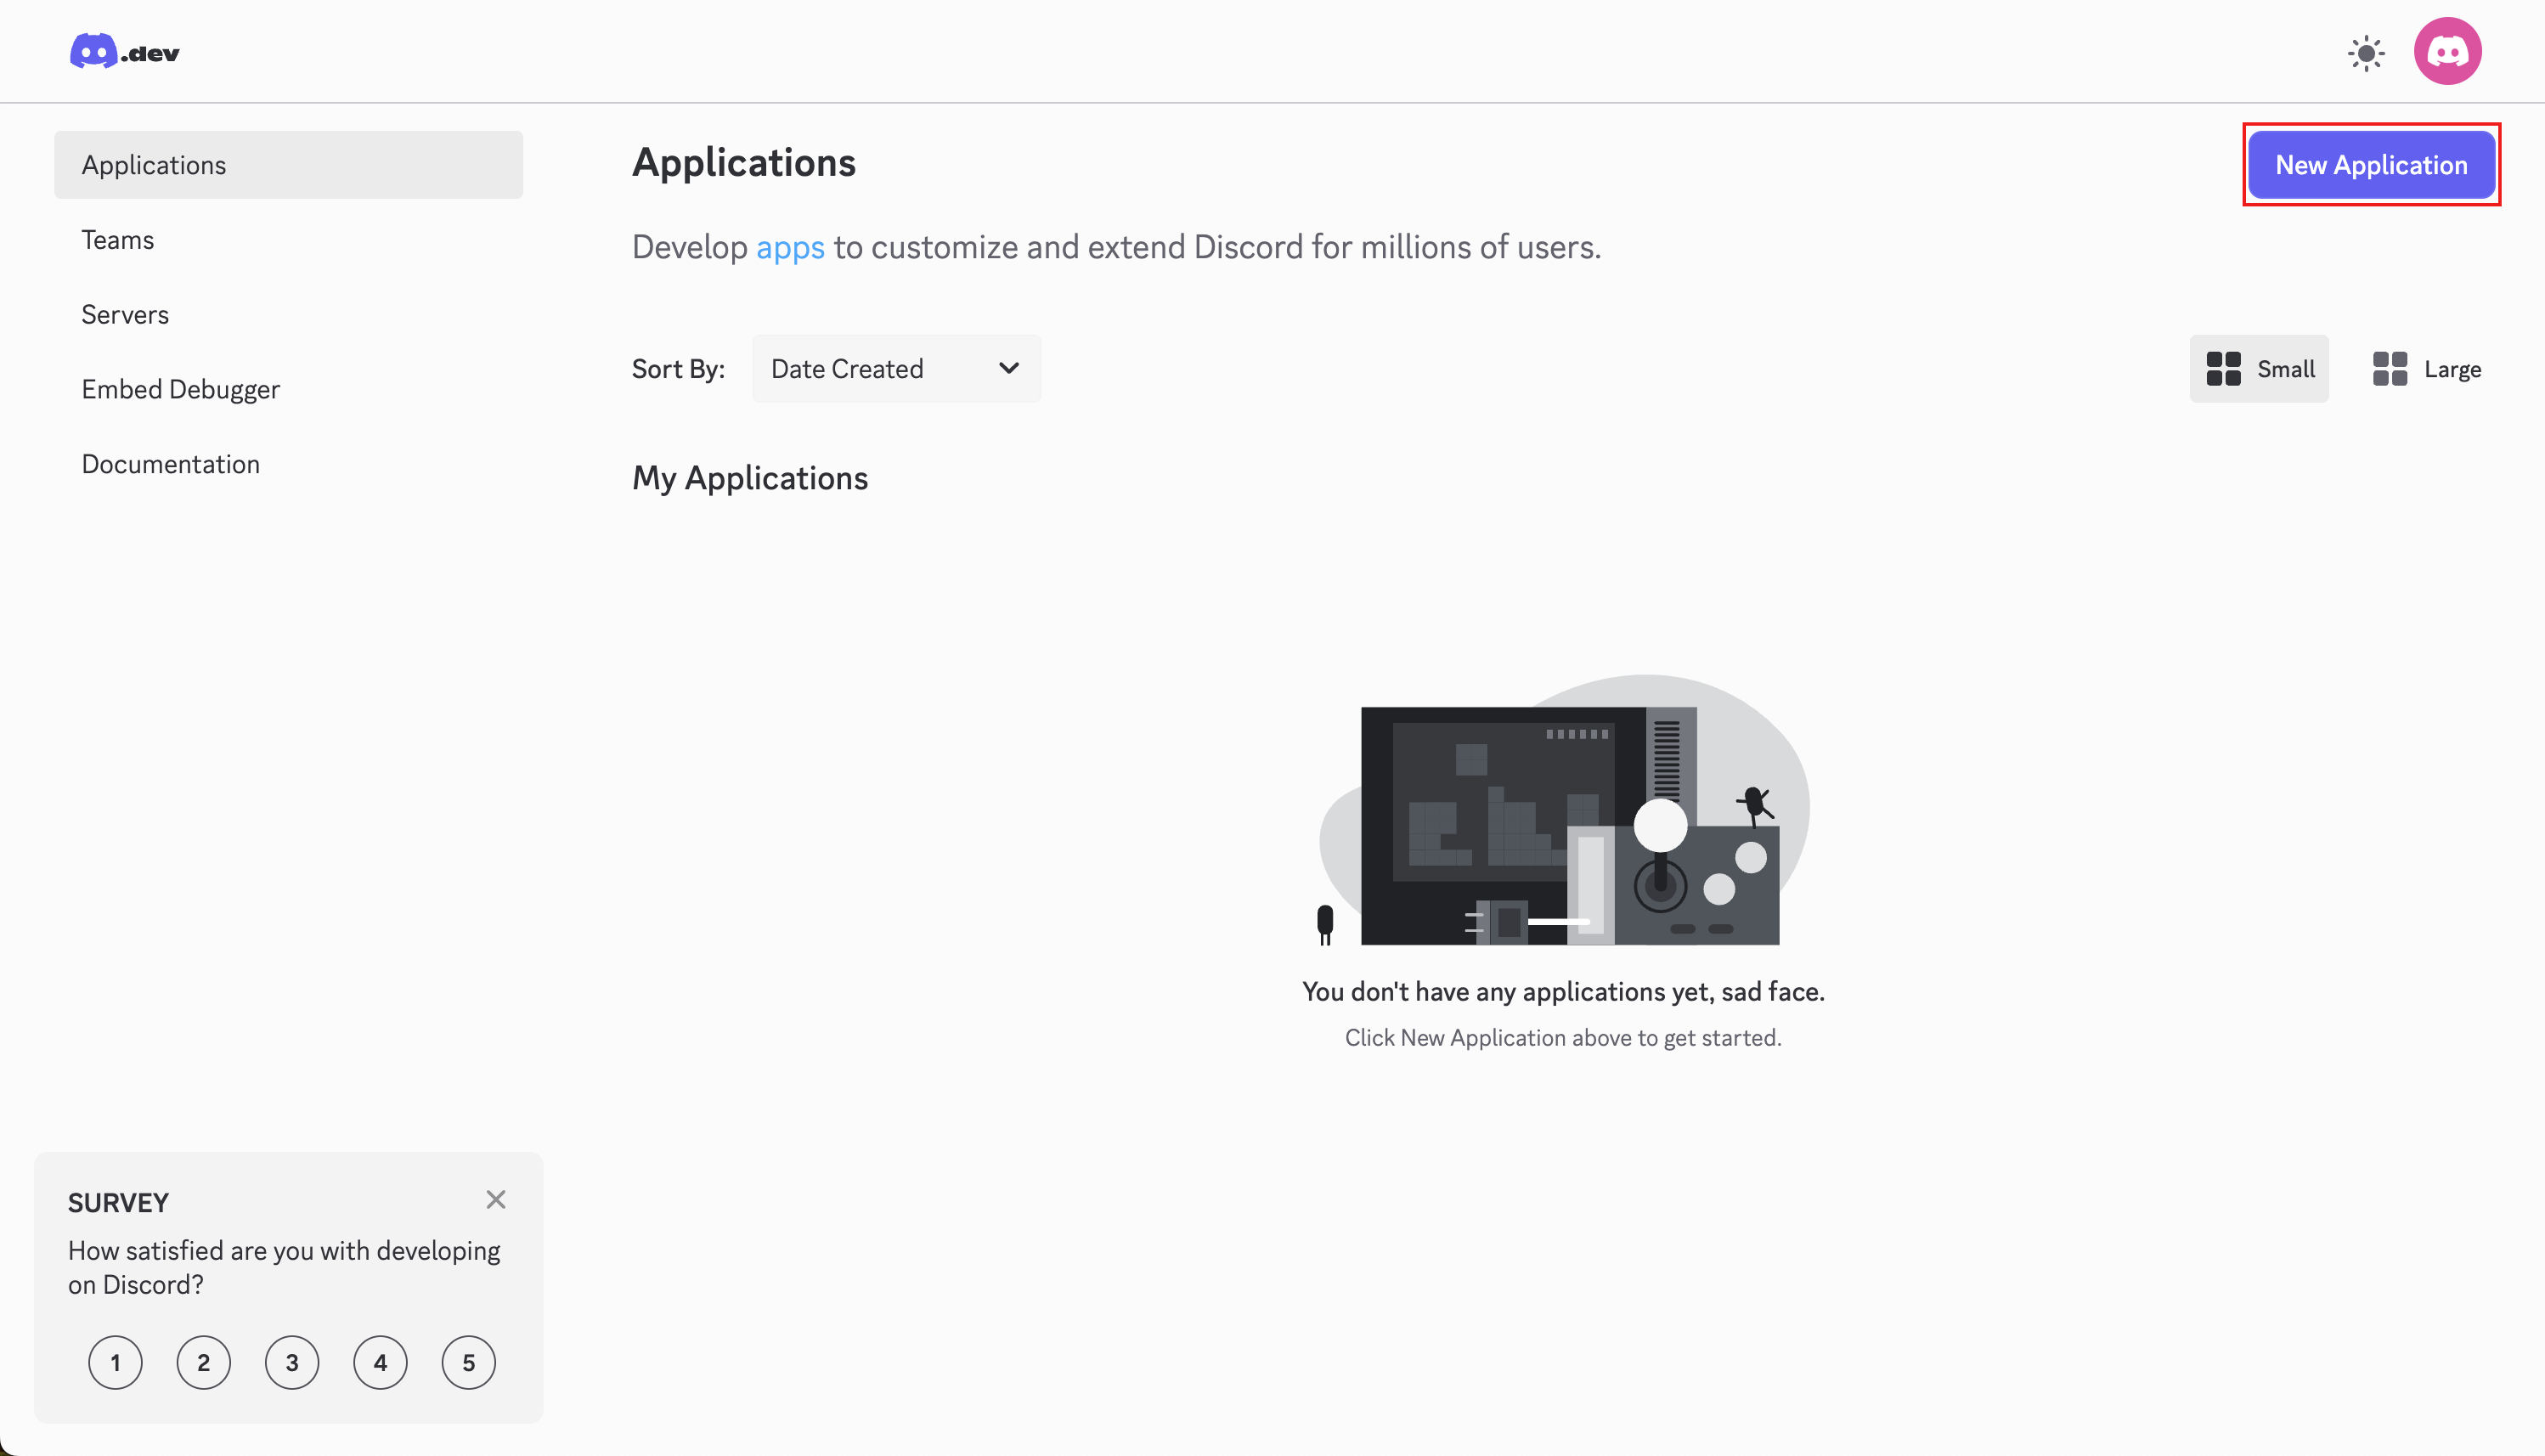
3.3.1 Create Discord Application
Go to Discord Developer Portal > Application > New Application
3.3.2 Get Bot Token
After creating Application according to page guidance, select and enter in the left navigation:
- Bot > Add Bot > Reset Token > copy token
Copy the Bot token and enter it in the server terminal.

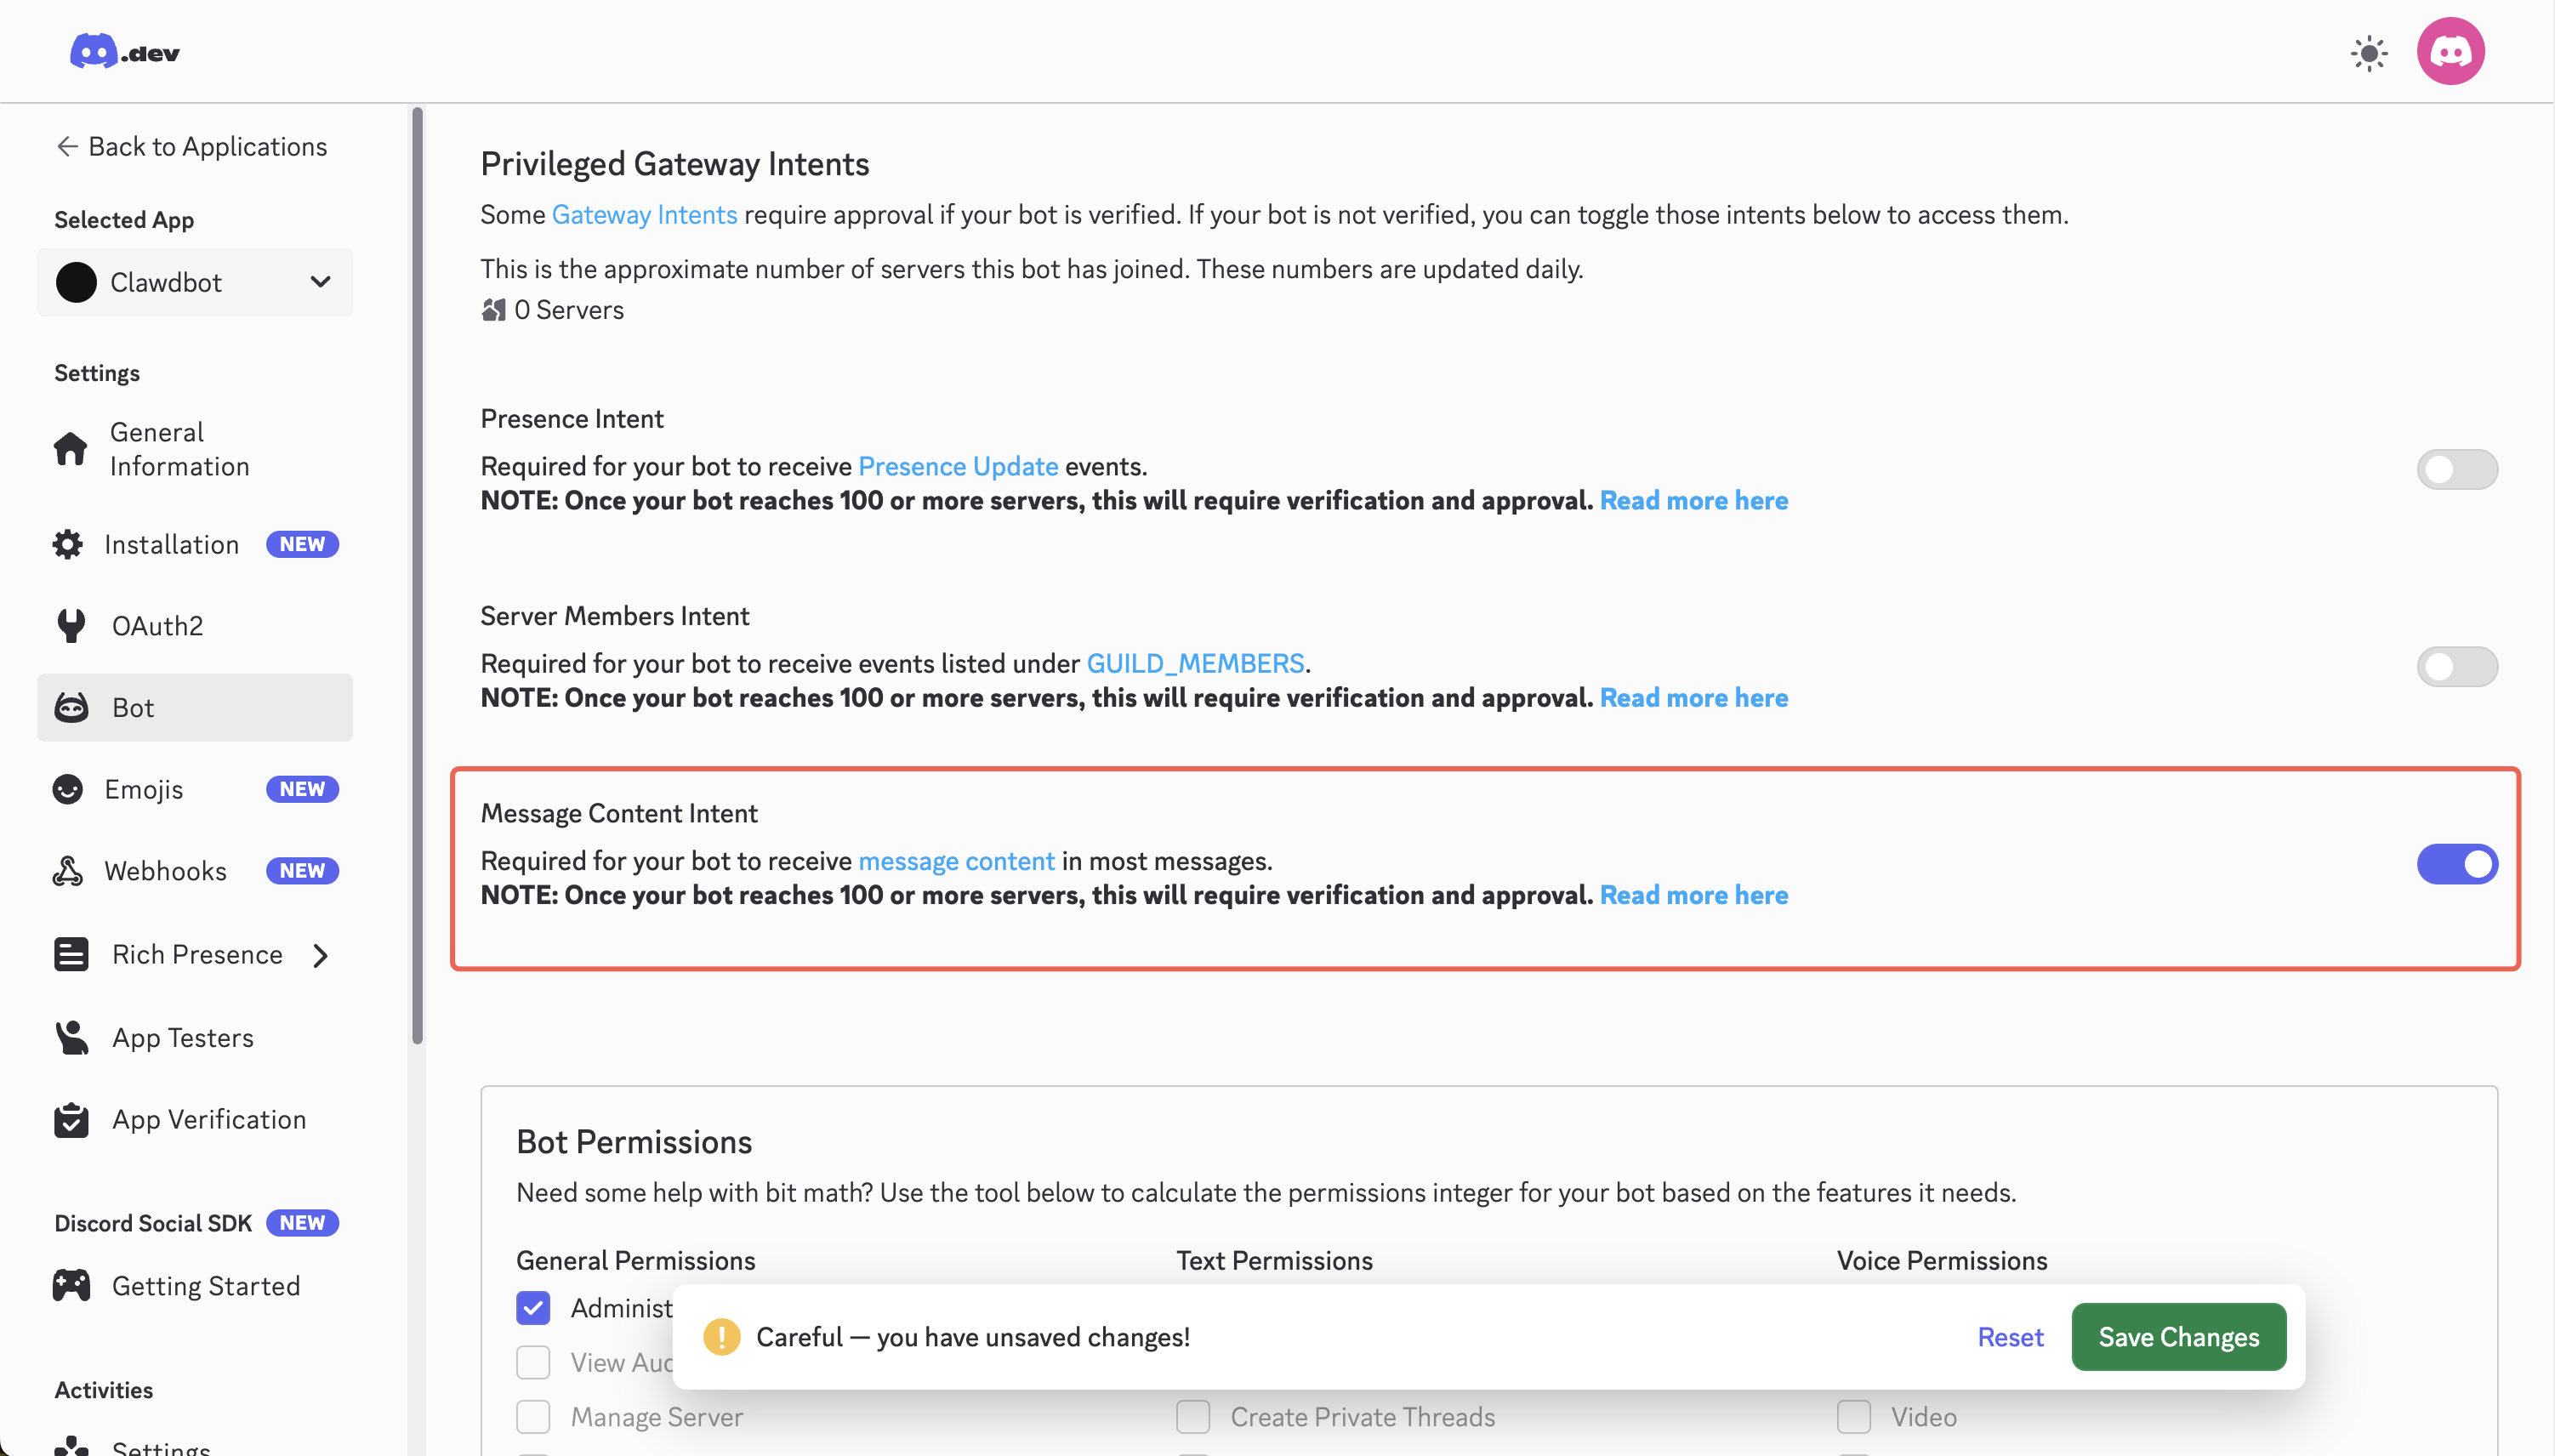
3.3.3 Enable Message Permissions
Enable Message Content Intent option on the page and save.
3.3.4 Generate Invite Link and Add Bot
- Enter OAuth2 option, scroll down the page
- Check bot in OAuth2 URL Generator
- Check Send Messages and Read Message History in Bot Permissions
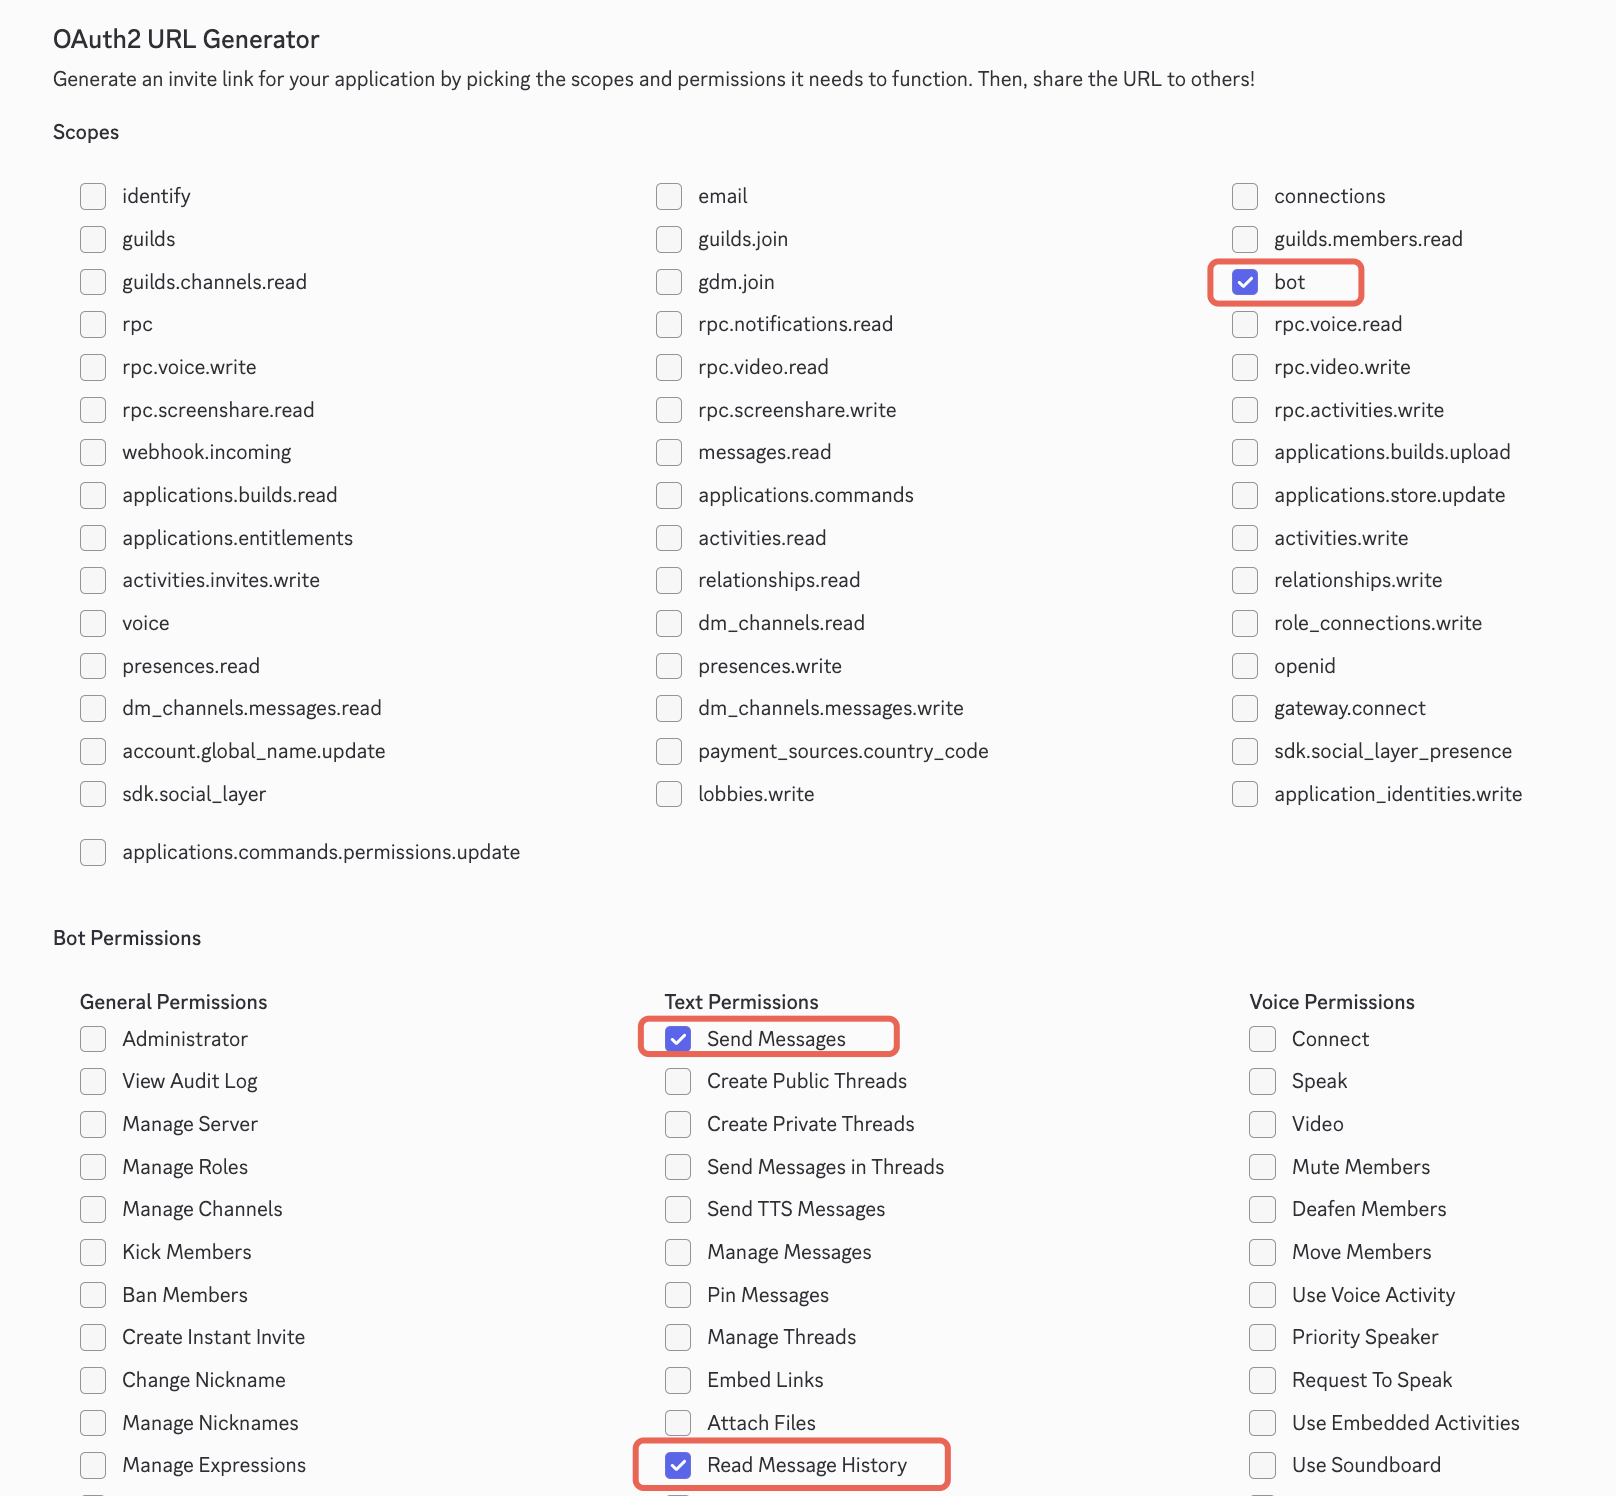
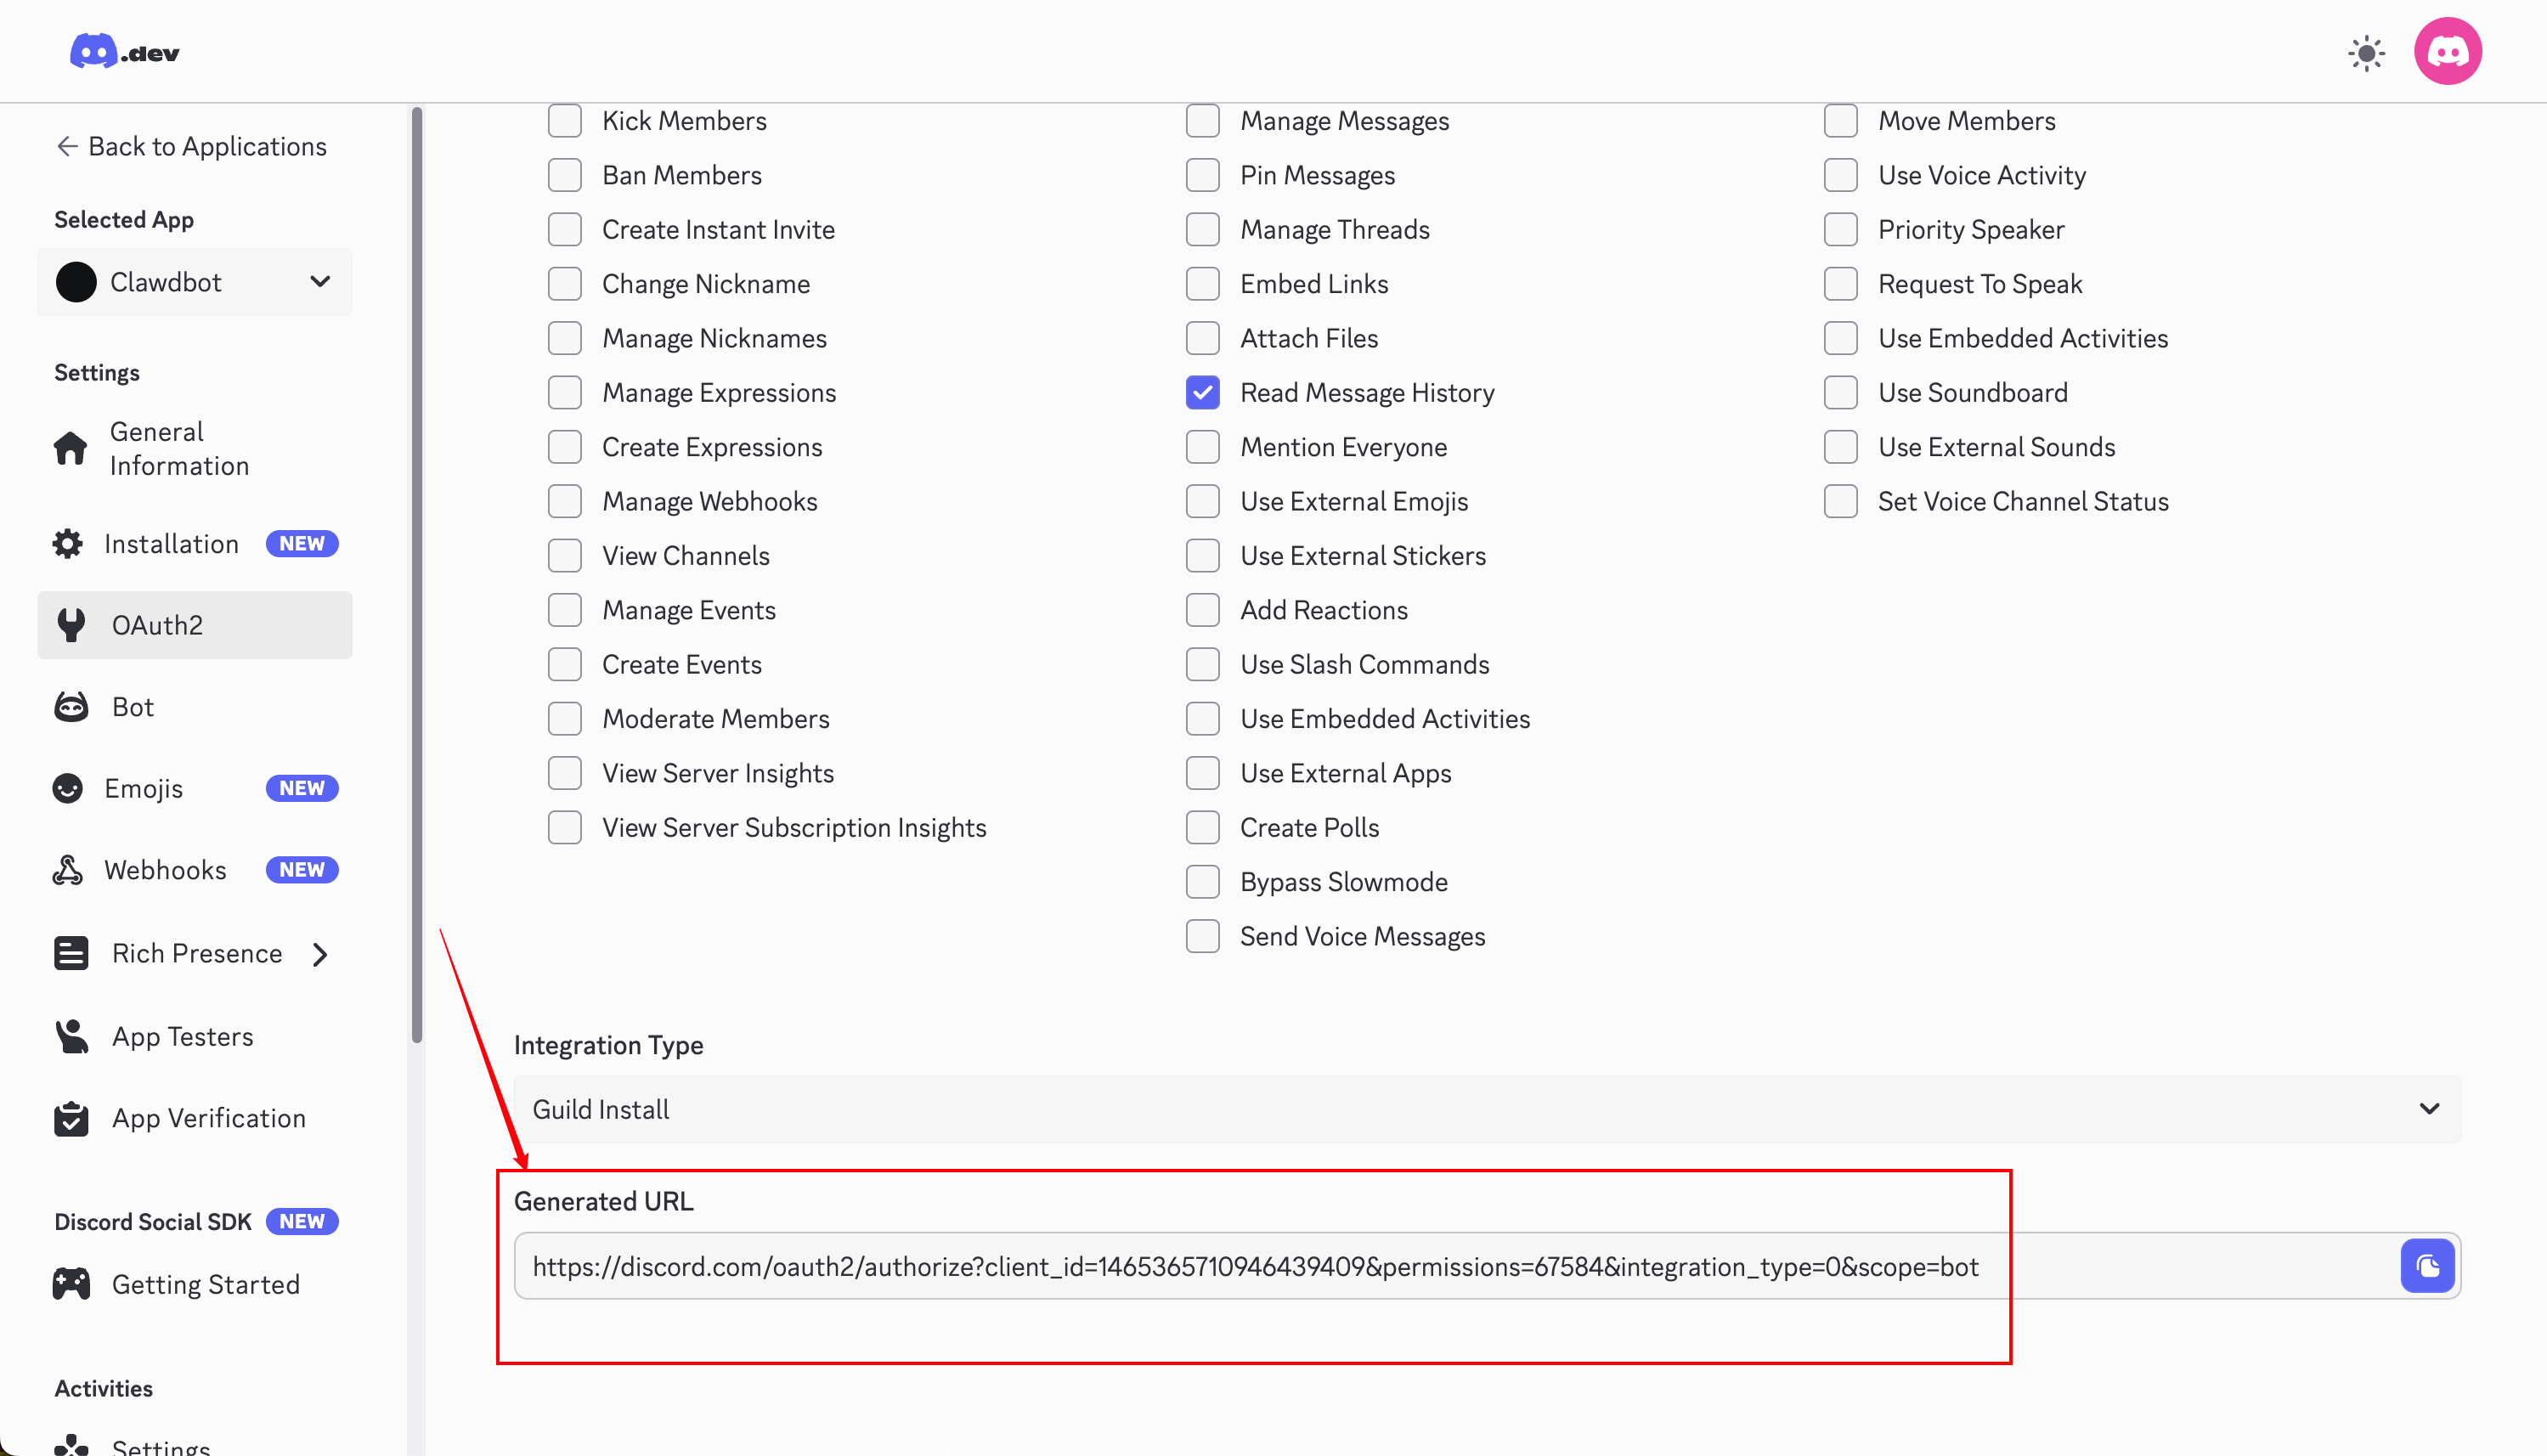
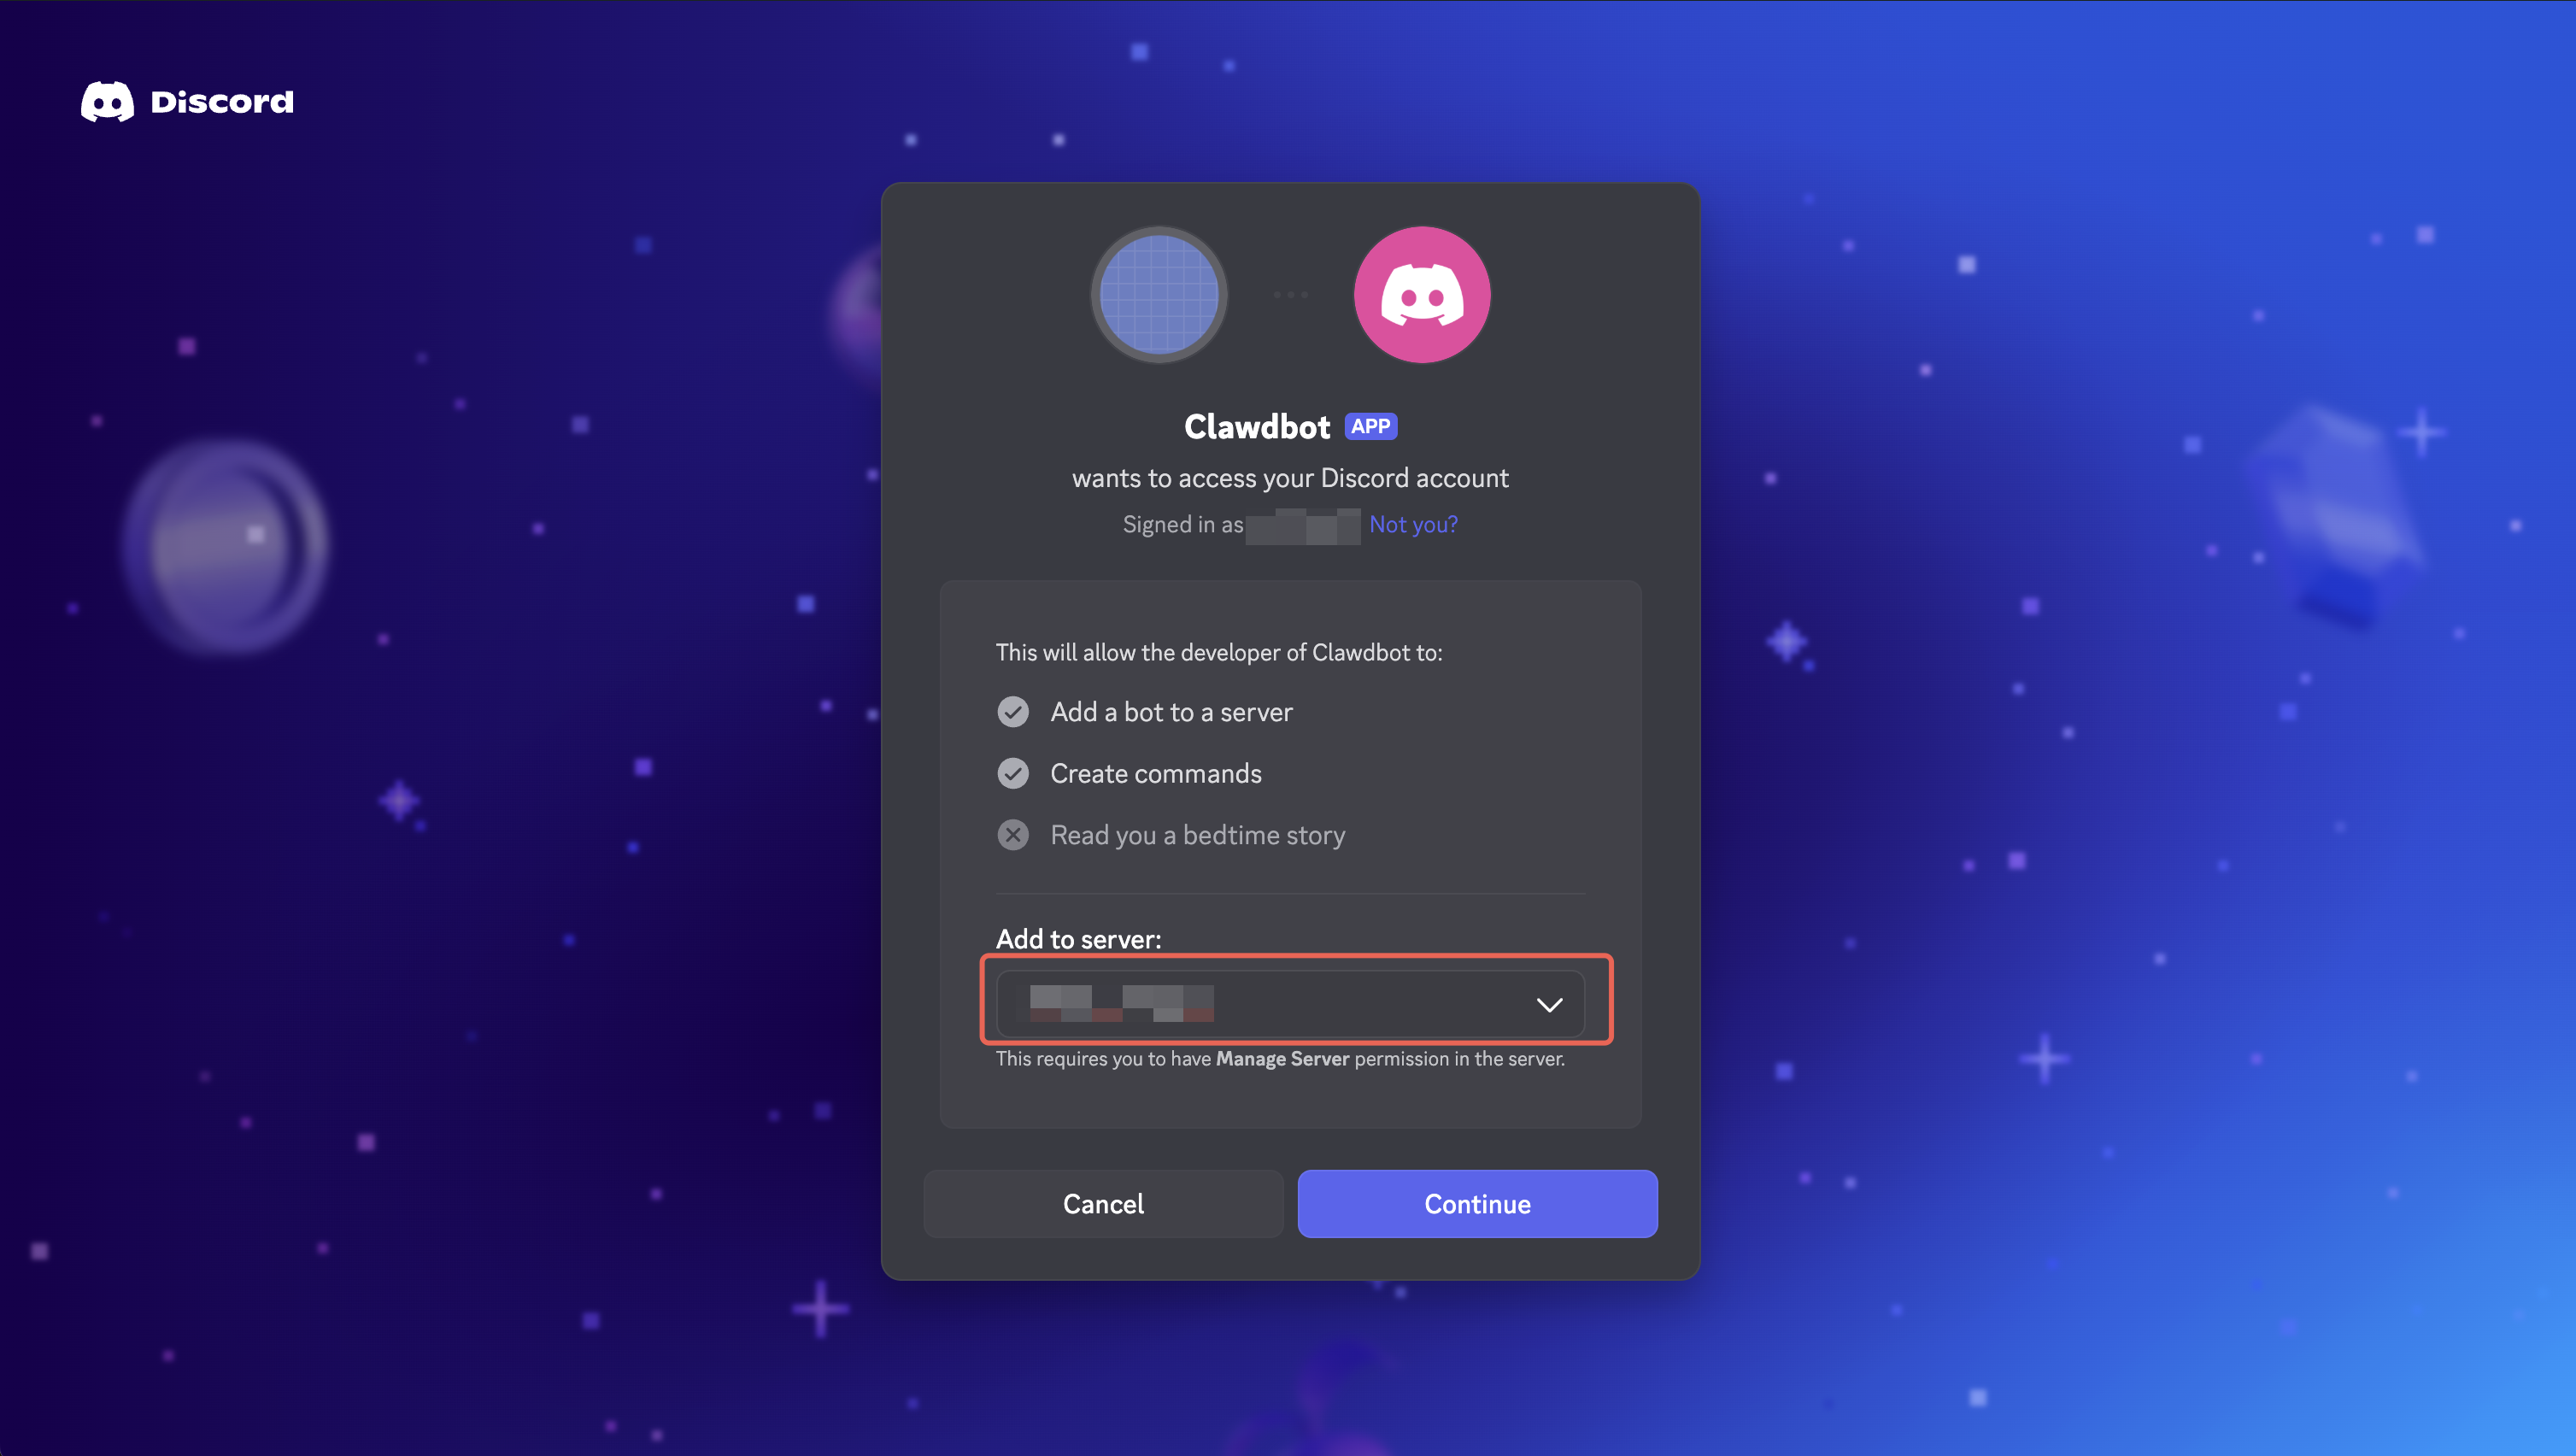
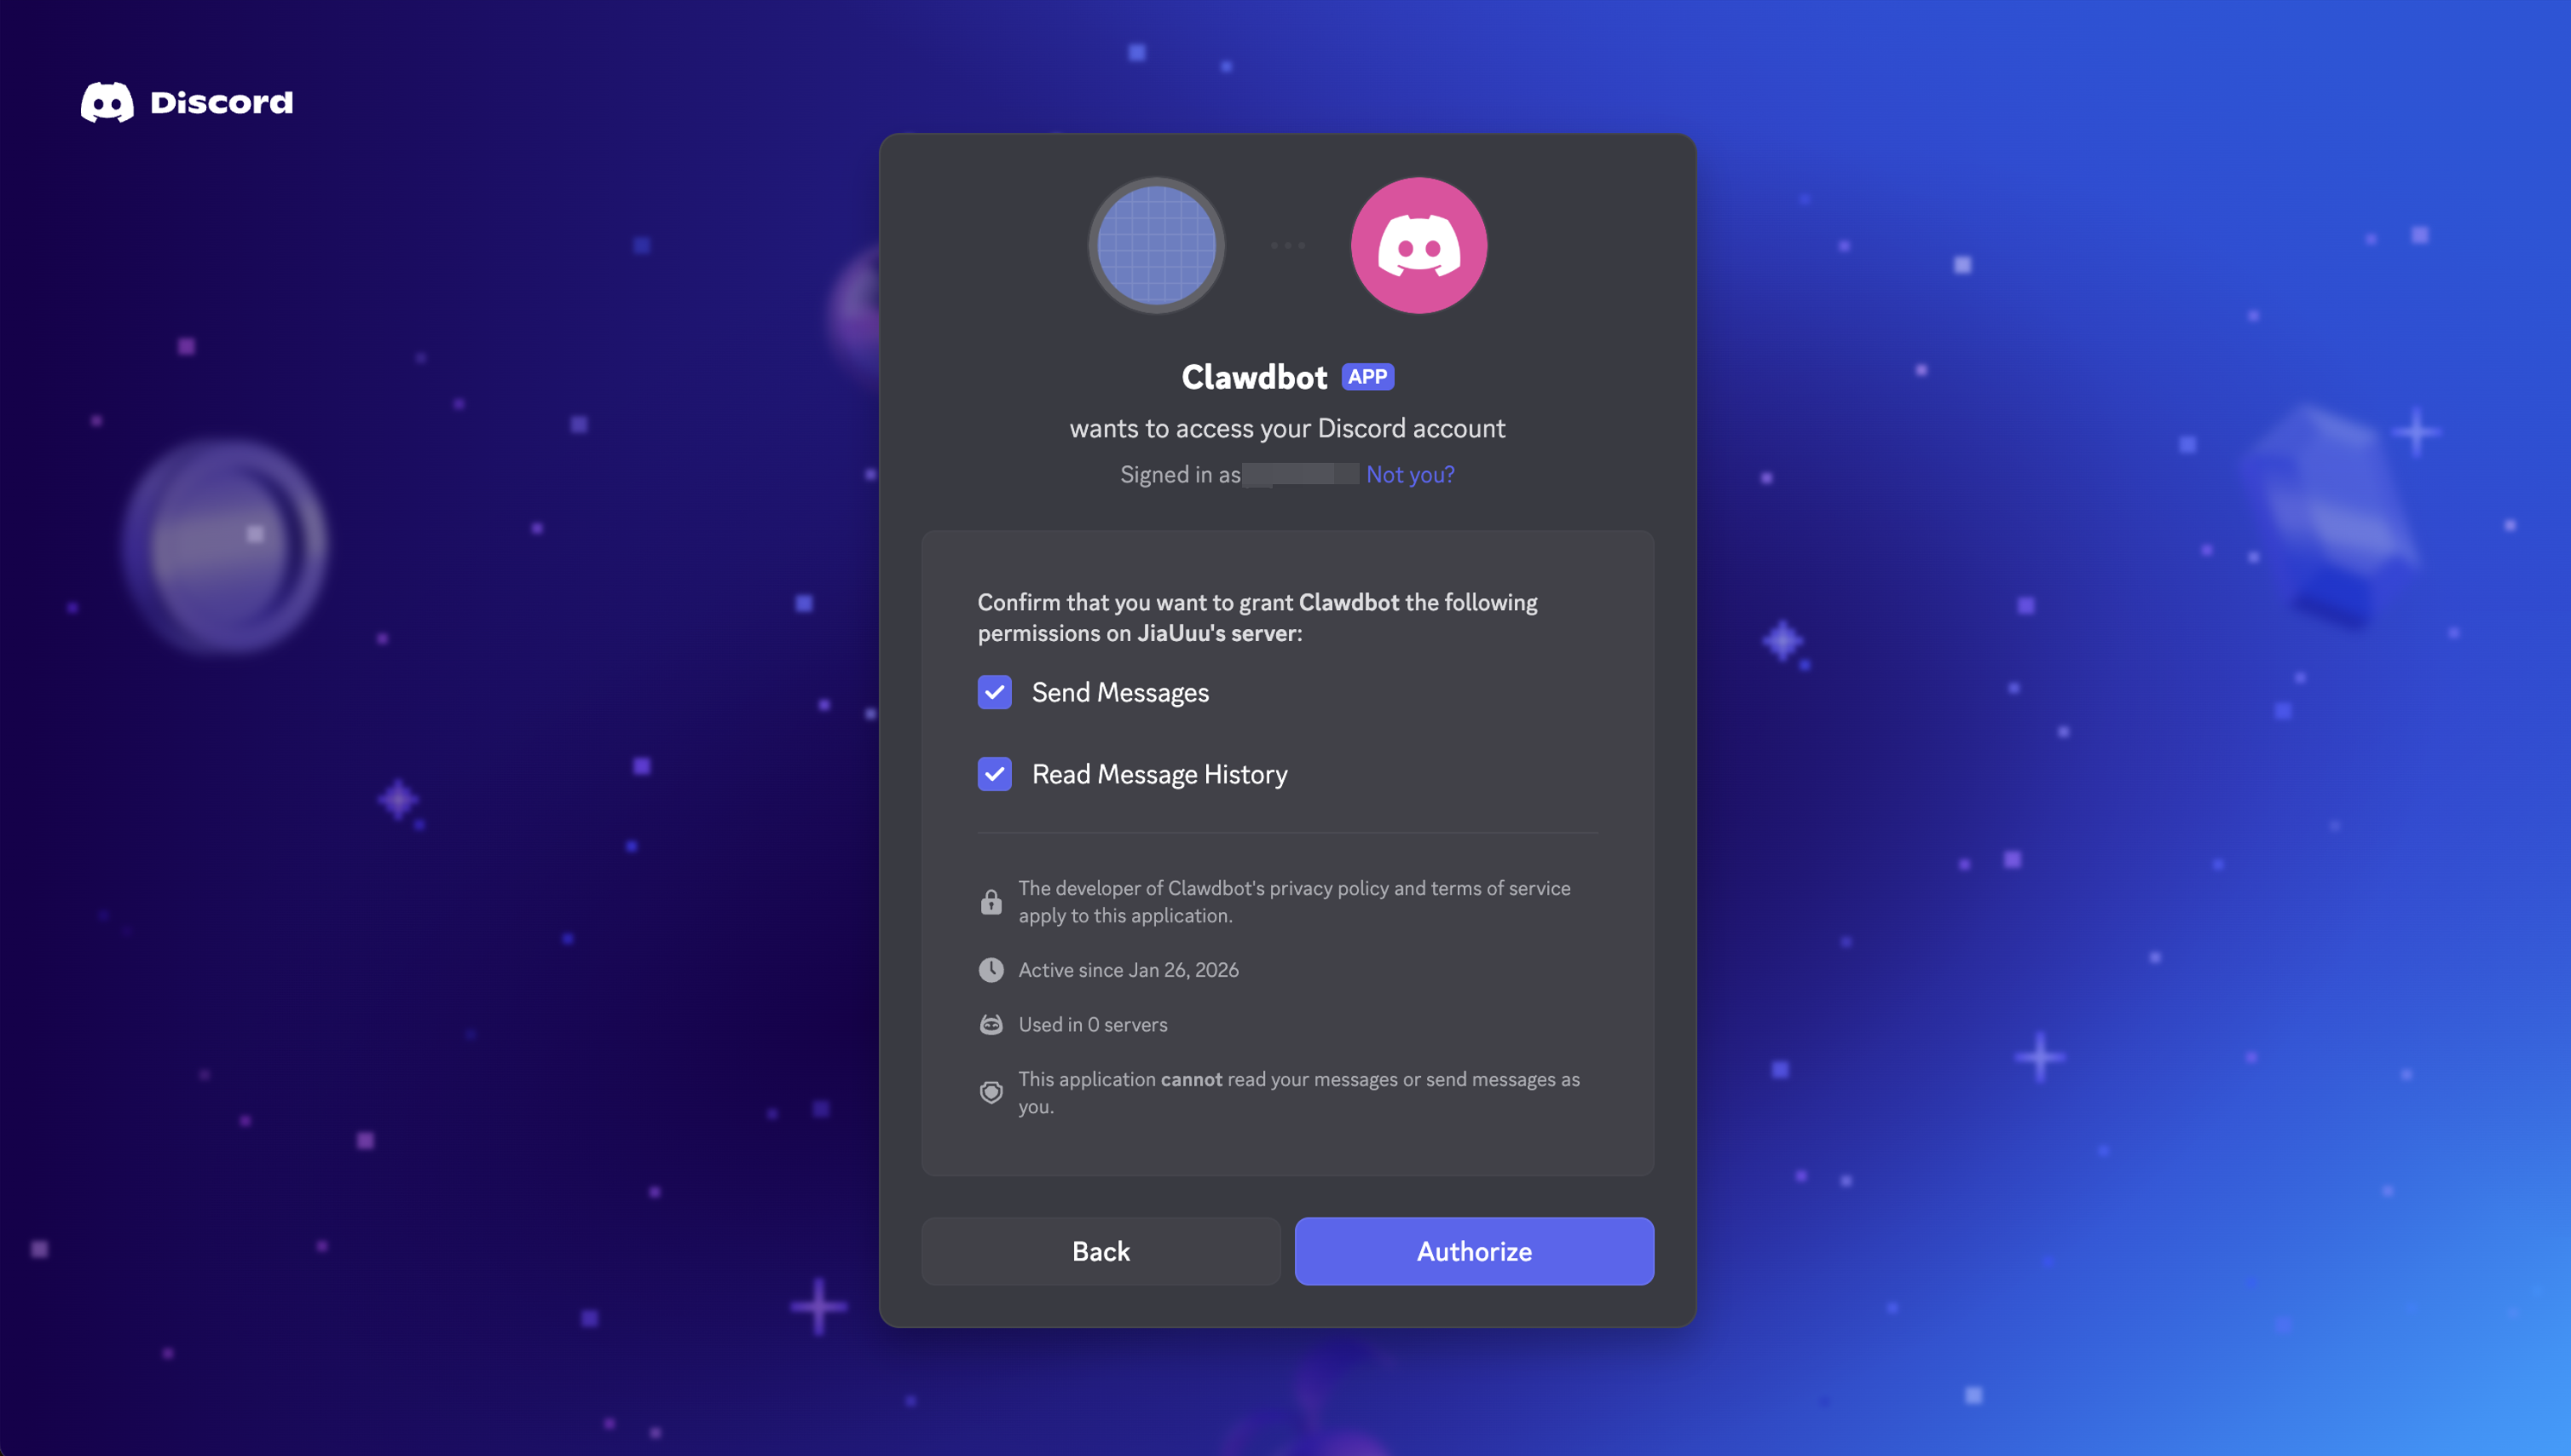
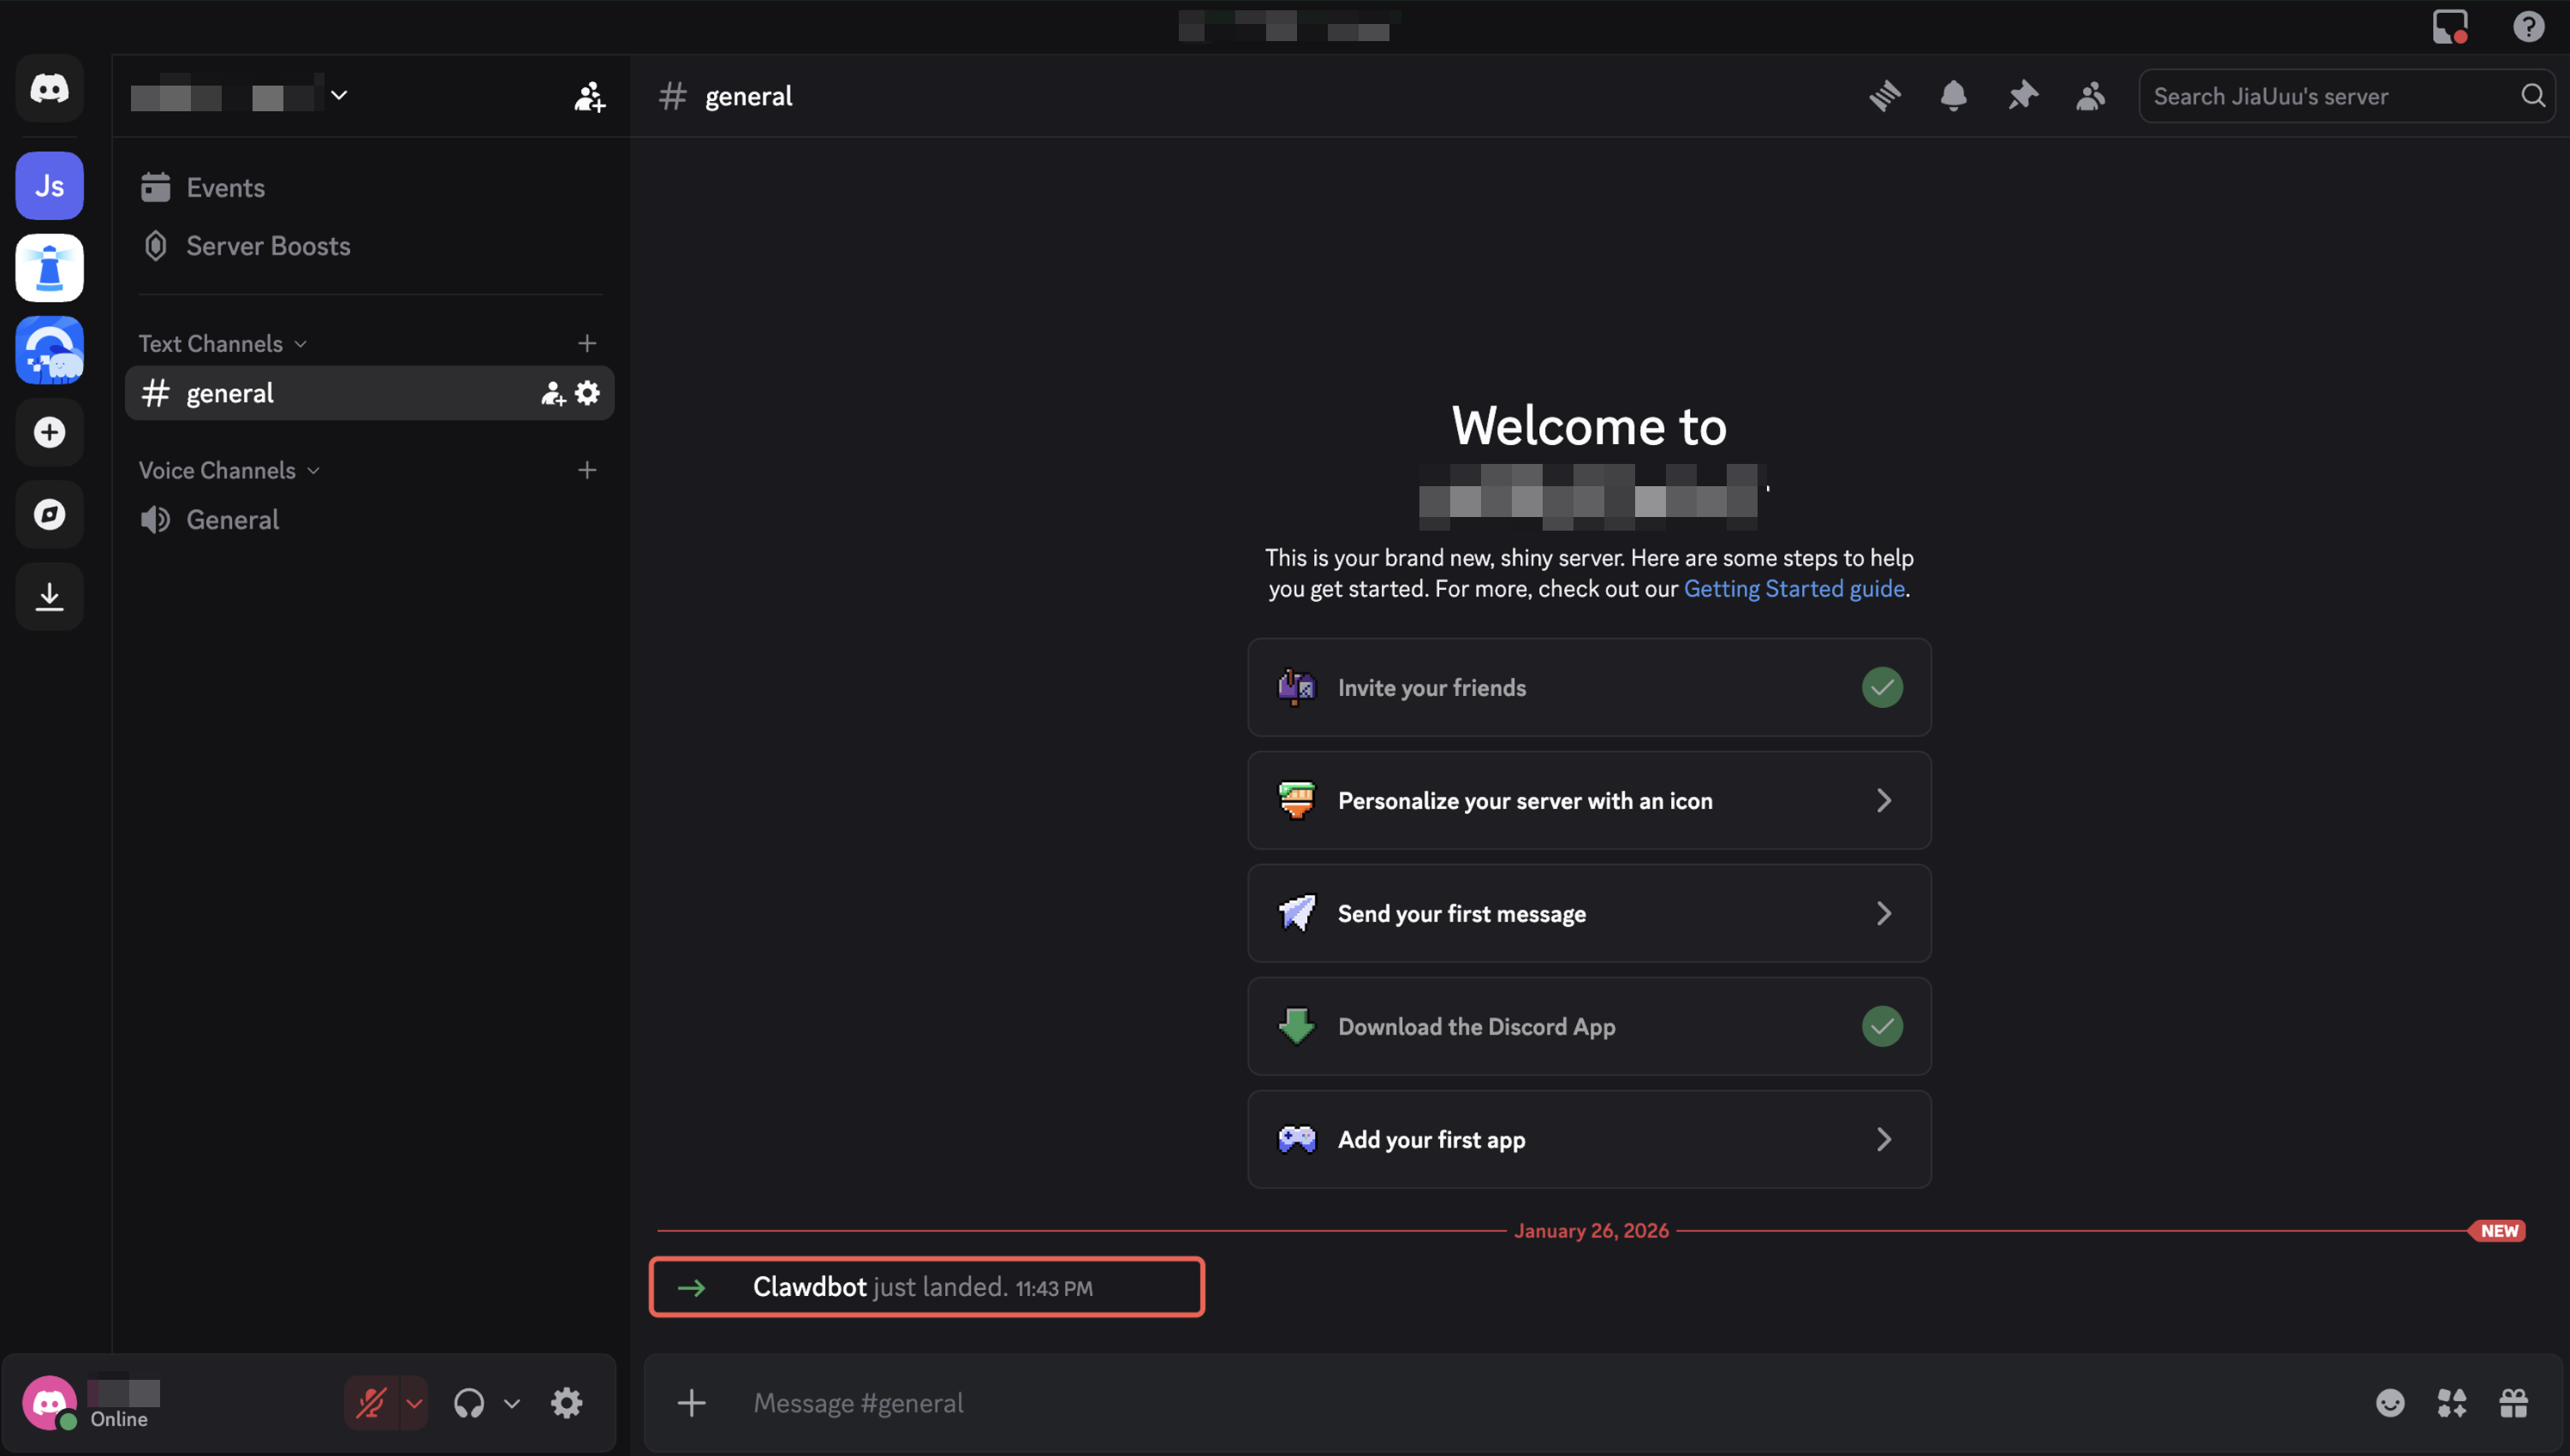
Scroll to the bottom of the page, copy the link and open in browser, select the server to invite, click Continue to authorize, then you can invite bot to join.
The effect after adding is shown below:
3.4 Complete Remaining Configuration
Return to server terminal and complete remaining configuration options according to wizard prompts.
Step 4: Start and Verify OpenClaw (5 minutes)
4.1 Start Gateway
After completing the above configuration, run the following command on the server to start Gateway:
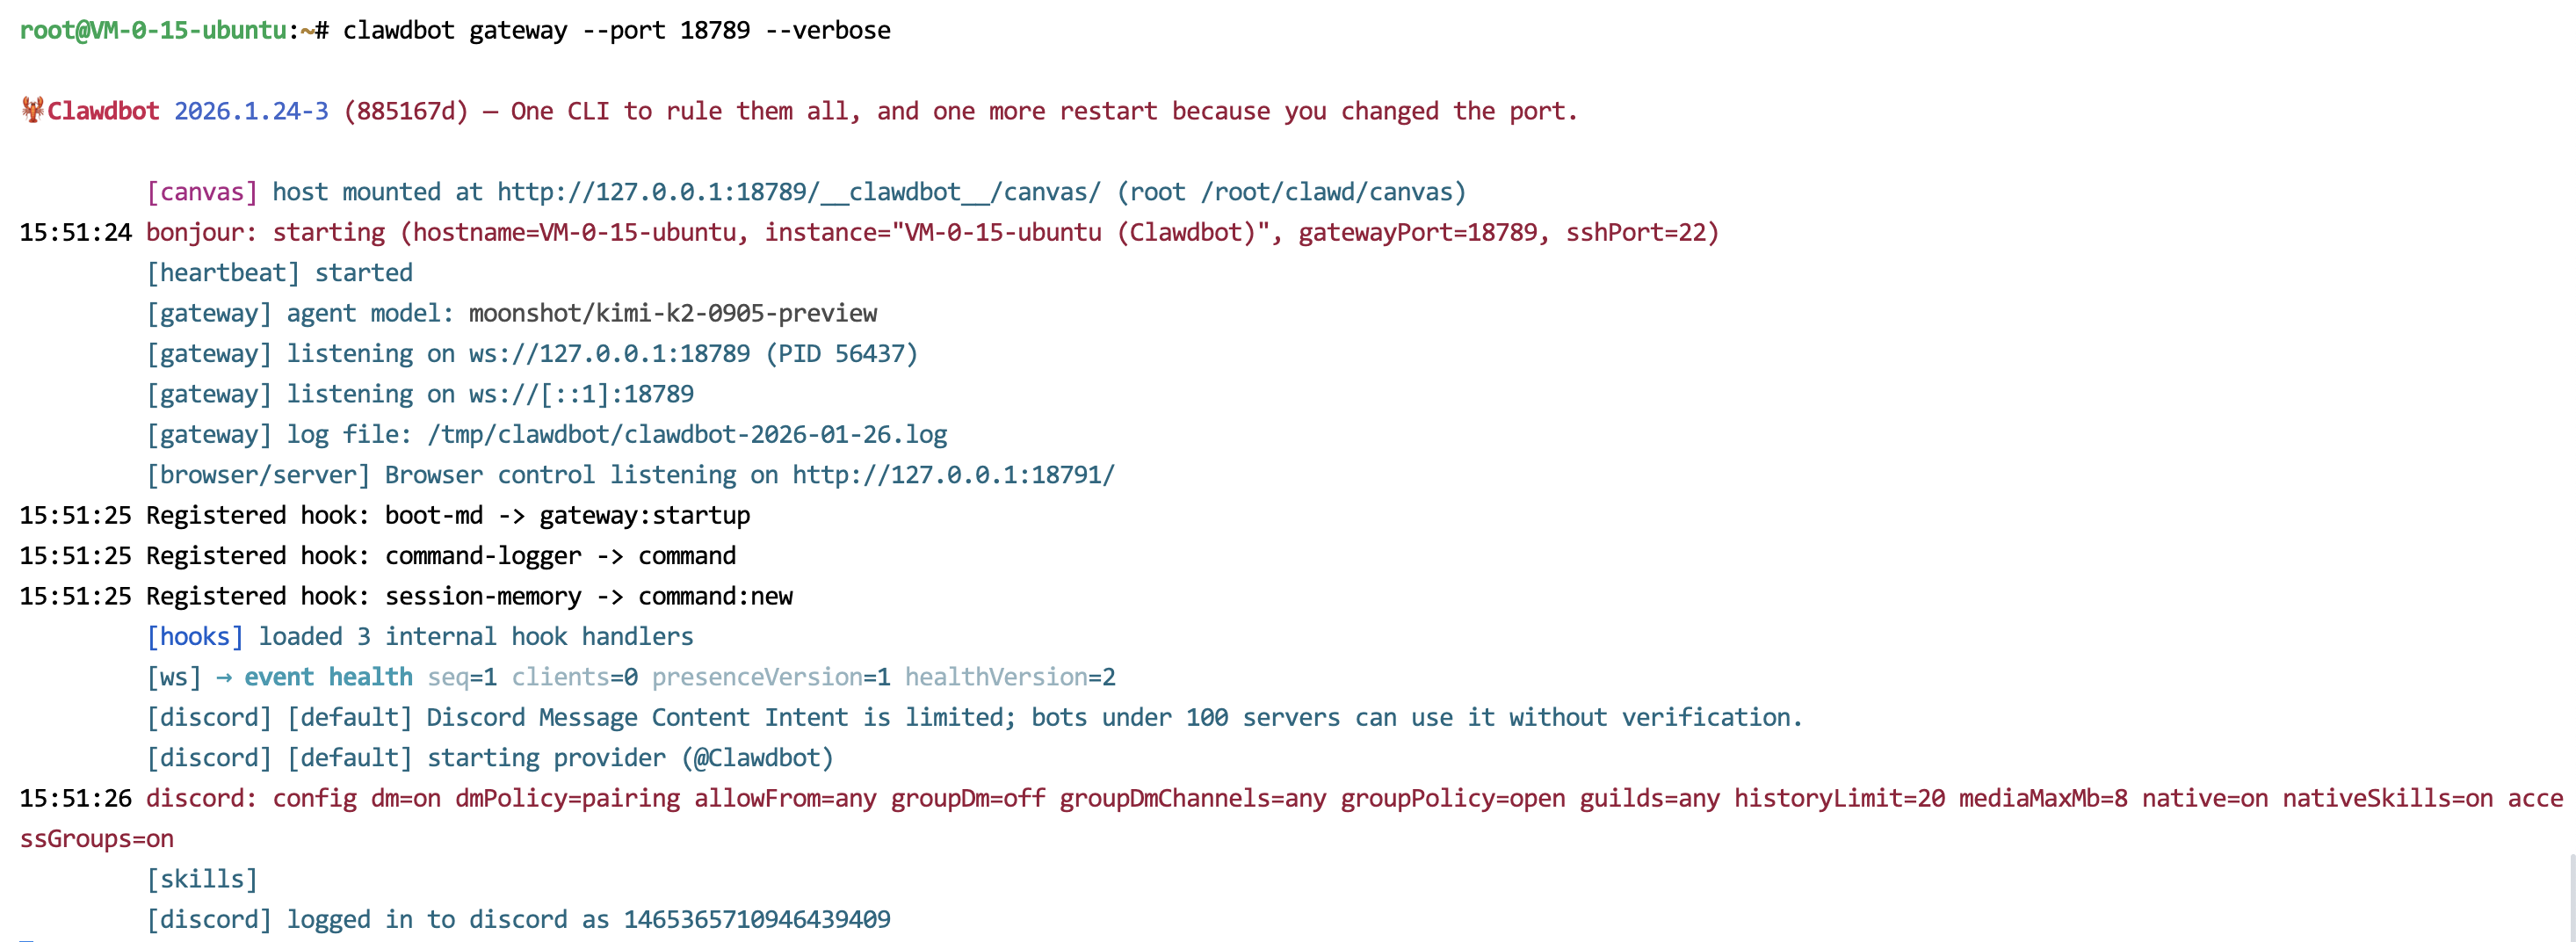
clawdbot gateway --port 18789 --verbose
Effect after successful startup:
4.2 Get Pairing Code
After successful startup, return to Discord and private message the bot to get the pairing code.
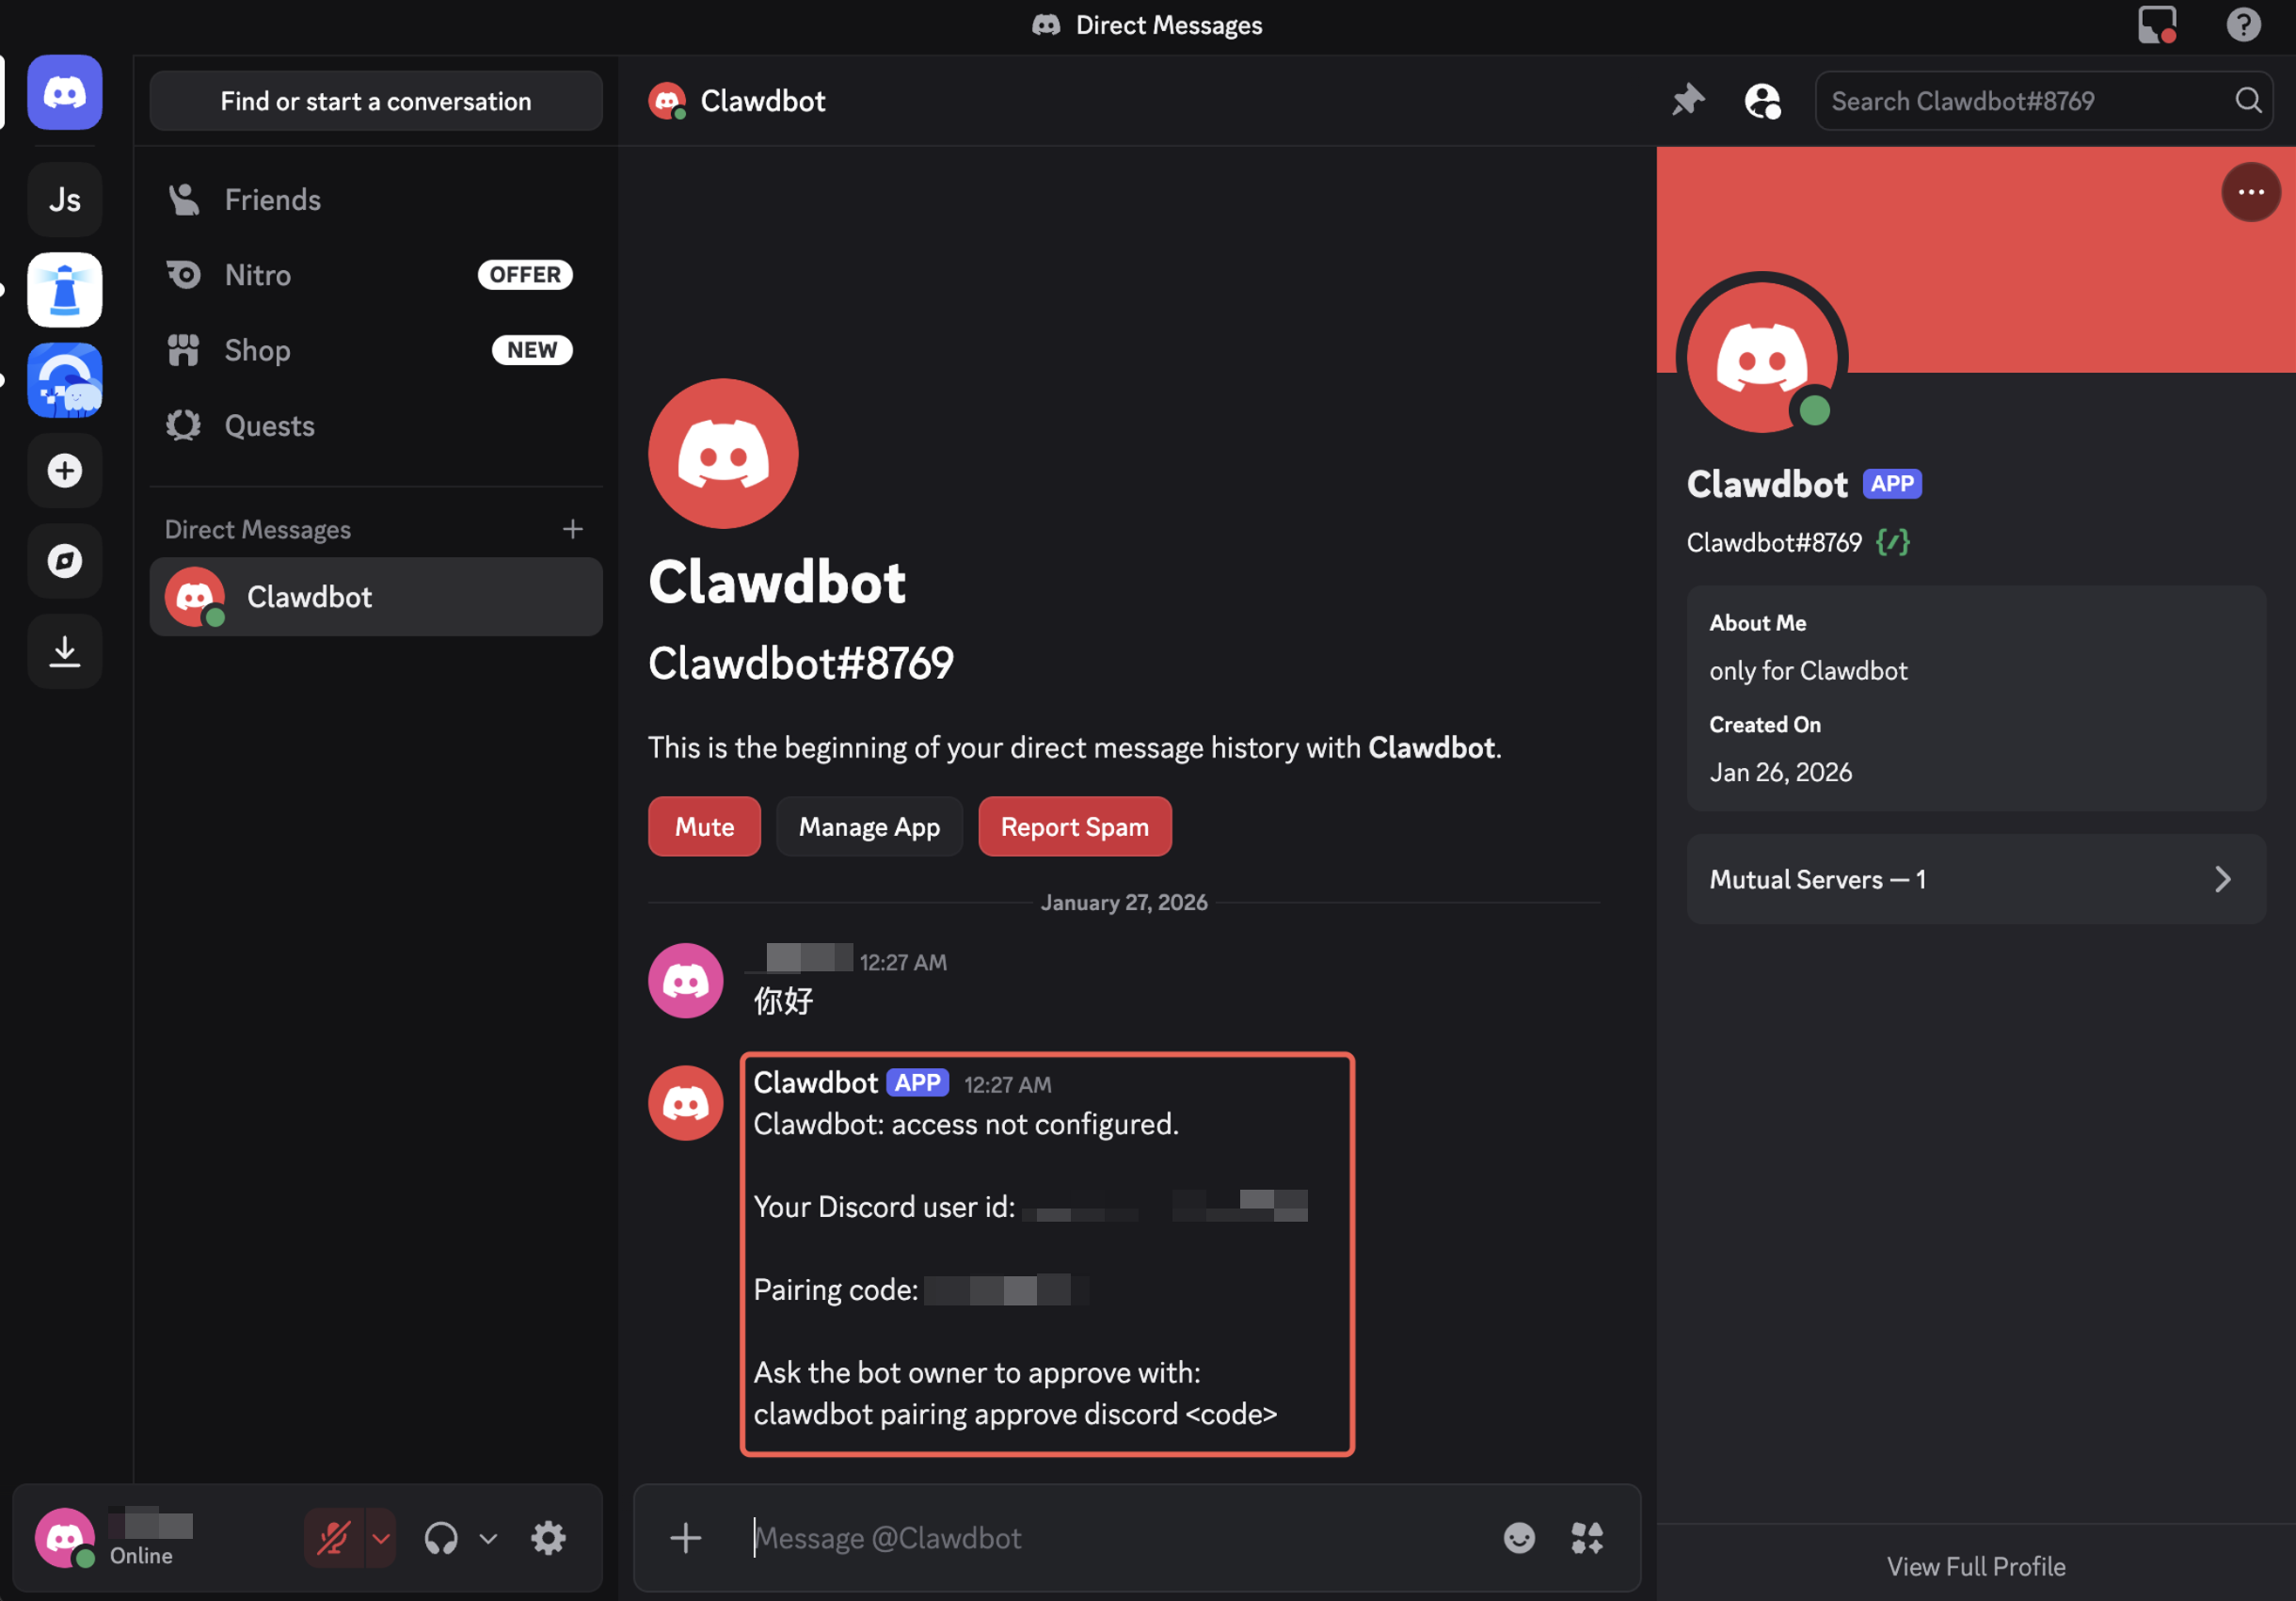
4.3 Complete Pairing
Return to server, use Ctrl+C to terminate Gateway, run the following command to pair:
clawdbot pairing approve discord <code>
Note: Replace
<code>with the actual pairing code you got from Discord.
4.4 Restart and Test
After pairing is complete, run the following command to run Gateway:
clawdbot gateway --port 18789 --verbose
Return to Discord and chat with the bot. If it responds normally, deployment is successful! 🎉
FAQ
Q1: What’s the relationship between OpenClaw, Clawdbot, and Moltbot?
OpenClaw is the latest name of this project. The project was originally named Clawdbot, later renamed to Moltbot, and now officially named OpenClaw. All three names refer to the same project.
Q2: Why does the image name still show Moltbot?
Due to naming update delays for Tencent Cloud application images, the image name still shows the old name, but the latest version of OpenClaw is deployed.
Q3: How to keep Gateway running in the background?
It’s recommended to use systemd or screen/tmux tools to keep Gateway running continuously:
# Using screen
screen -S clawdbot
clawdbot gateway --port 18789 --verbose
# Press Ctrl+A+D to detach session
Q4: How to get Moonshot API Key?
Visit Moonshot AI Console to register and create API Key. New users usually have free quota.
Next Steps
Congratulations on successfully deploying OpenClaw! Now you can:
- Connect more tools: Gmail, GitHub, Google Drive, etc.
- Configure search functionality: Integrate Brave Search for real-time information
- Customize skills: Develop exclusive features according to your needs
- Explore more: Refer to OpenClaw Official Documentation
Start your AI assistant journey now! 🚀